Not everyone agrees on laser sights for handgun defensive use, but Kyle Schmidt thinks it’s a great training tool. READ WHY AND HOW
SOURCE: Team Springfield, by Kyle Schmidt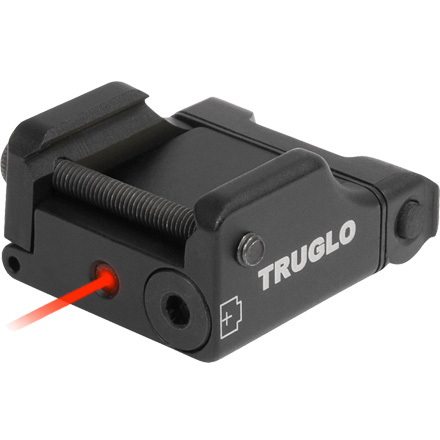 Although some people seem to disagree on whether or not a laser on a pistol is a “good” aiming device for self-defense shooting. One thing about them is undeniable: lasers are a great training tool.
Occasionally, when I am training friends, clients, or co-workers how to shoot, I will attach a laser to their gun to help them better understand some basic shooting concepts.
Before using the laser though, I like to make a target that has multiple areas to aim at with some level of contrast so it is easier to identify exactly where the laser is aimed.
LASER TARGET TIME
I make a dry practice target out of 2 USPSA targets. I use USPSA targets because they are different colors on each side. USPSA targets have an upper head with an A and B-zone and a body with A, C, and D-Zones. You will need a razor or a pair of scissors. You will only cut one of the targets, the other will remain intact. For simplification, we will refer to the target that we are cutting as Target 1 and the target which will remain intact as Target 2.
TARGET 1 CUTS:
Cut out the A-zone of the head (upper target zone).
Cut the C-zone out of the target. The body A-zone is included in this cut. Be careful to leave the head attached (don’t cut off the head); You need to razor / cut under the perforations while trimming near the head.
Target 1 should now have two big holes in it; one where the A-zone head was and one where the body C and A-zones were.
Cut the body A-zone out of the C-zone piece you previously removed (Step 2). Keep the body A-zone, but discard the left over C-zone piece.
COMBINE TARGETS:
Stage Target 2 with the shoot side (tan side) facing up.
Stage Target 1 with the no-shoot side (white side) facing up.
Place what remains of Target 1 on top of Target 2.
This should make a white colored target in the D and B-zones, with the tan colored target in the C and head A-zones. Use small pieces of white tape to tape the top, bottom and sides of the two targets together.
This is your new Laser Target 1.
ALMOST DONE:

Flip the targets over so Target 2 (white side) is facing up. Place the tan colored side of the body A-zone (that you cut from Target 1, step 4) on top of Target 2 A-zone. If you have trouble lining up the A-zones, you can push a small push pin through the diagonal corners of the A-zone on Target 2. Use the push pin holes to align the corners of the body A-zone.
To finish the dry practice target off, I add a one-inch black square piece of tape to the center of the corresponding scoring zone. I like to measure the center of the C-zone’s height, as the perforated “A” is NOT the center of the A-zone.
This is your new Laser Target 2.
Now you should have one practice target that has 5 distinctly noticeable scoring zones; A-zone body, A-zone head, entire head, C-zone body, and the entire target. Additionally, you have a one-inch black piece of tape on each side of the target.
ATTACH AND ZERO LASER
Before you begin your laser dry practice, attach and zero the laser at the distance you plan to practice. This is critical for some of the drills we are going do with the laser. (Check out sights HERE.)
Here is how I zero the laser for dry practice:
Choose your distance and target.
Point / aim gun at specific spot on target.
Line up the fixed notch and post sights on target.
Adjust the dot (from the laser) so it is 1) centered (left and right) on the front sight and 2) the front sight covers half of the dot (up and down). Only the top half of the dot will be visible.
Because the laser is mounted so far below the fixed sights, the laser will need to be realigned with the sights if you want to try a drill at a different distance.
HOLDING / AIMING LASER DRILL
When I was writing this, I had just returned from Camp Perry where I was learning about shooting the sport of Bullseye. This is the ultimate challenge in fundamental pistol accuracy. It requires execution of some of the most fundamental techniques required for extreme accurate pistol shooting. If you are not familiar, all of the strings of fire are shot with your strong hand only, at 25 yards and 50 yards, on a target with the 10-ring measuring just under 2.5 inches. Bullseye, in short, is a very difficult shooting discipline.
One of the things I noticed as I am trying to shoot the 50-yard line strings is how much my gun is moving (or appears to be moving) compared to the center of the target. This is not only a problem in bullseye shooting, it is just greatly magnified due to the distances.
A shooter must know what their ability to “hold” on a target is, with varying degrees of difficulty. One of the best ways to test this is with a laser, and generally, it is easiest to see the laser in reduced lighting. Try this “holding” drill:
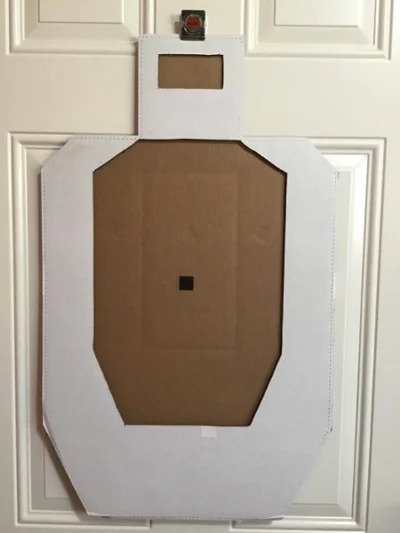
Get your Laser Target 1 — with the C-zone side visible.
Set the target up at the distance of your choice, let’s say 15 yards for this example.
With the laser turned off, use the iron sights to aim in the center of the C-zone. Make note of how stable the gun is while you are aiming in the middle. We are not pressing the trigger yet, only aiming the gun.
Now turn on the laser and shift your focus to the laser’s dot on the target. Make note of how stable the dot is on the target while you are aiming. It’s probably moving around more than you would think or like.
Try to keep the dot inside the C-zone — hopefully this is fairly easy. It should be readily apparent when the dot leaves the C-zone and enters the white background of the D-zone on the dry practice target.
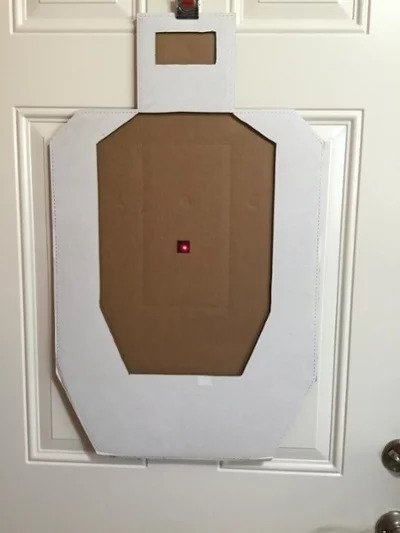
When you can easily do this, flip the target over to use Laser Target 2, and repeat the drill.
First steady the dot in the body’s A-zone.
Once you are able to keep the dot in the A-zone of the body, move up to the head and see if you can “hold” the dot in the head reliably. This may not be as easy as it seems.
Once you have mastered the entire head, move to the head’s A-zone (on Laser Target 1).
Finally, test your hold on the 1-in. black square of tape.
You can continue to experiment at different distances to see how well you can hold in the different scoring zones.
WHY DOES HOLDING MATTER?
Quite simply, if you can’t “hold” or keep the gun aimed in a particular target zone, it is unlikely that your bullet will impact the desired scoring zone reliably.
You can use this dry practice tip to determine if you are improving your ability to keep the gun steadily aimed in the intended target area.
HERE is a great laser sight!