
Priming is the final case preparation step, and it’s one of the most important. Read how to do it right.
Glen Zediker
There are pretty much three different style tools used to seat primers.
The first, and way on most common, is the priming “arm” attached to most every single-stage press. This works, but it’s the least best way to do it. There’s too much leverage at hand, and that makes it hard to feel the seating process to its best conclusion.
Take a close look at how a primer is constructed: there’s a cylindrical cup, inside the cup is the incendiary compound, and then there’s the anvil (that’s the little part that extends below the cup rim; it’s like a flat spring with three feet).
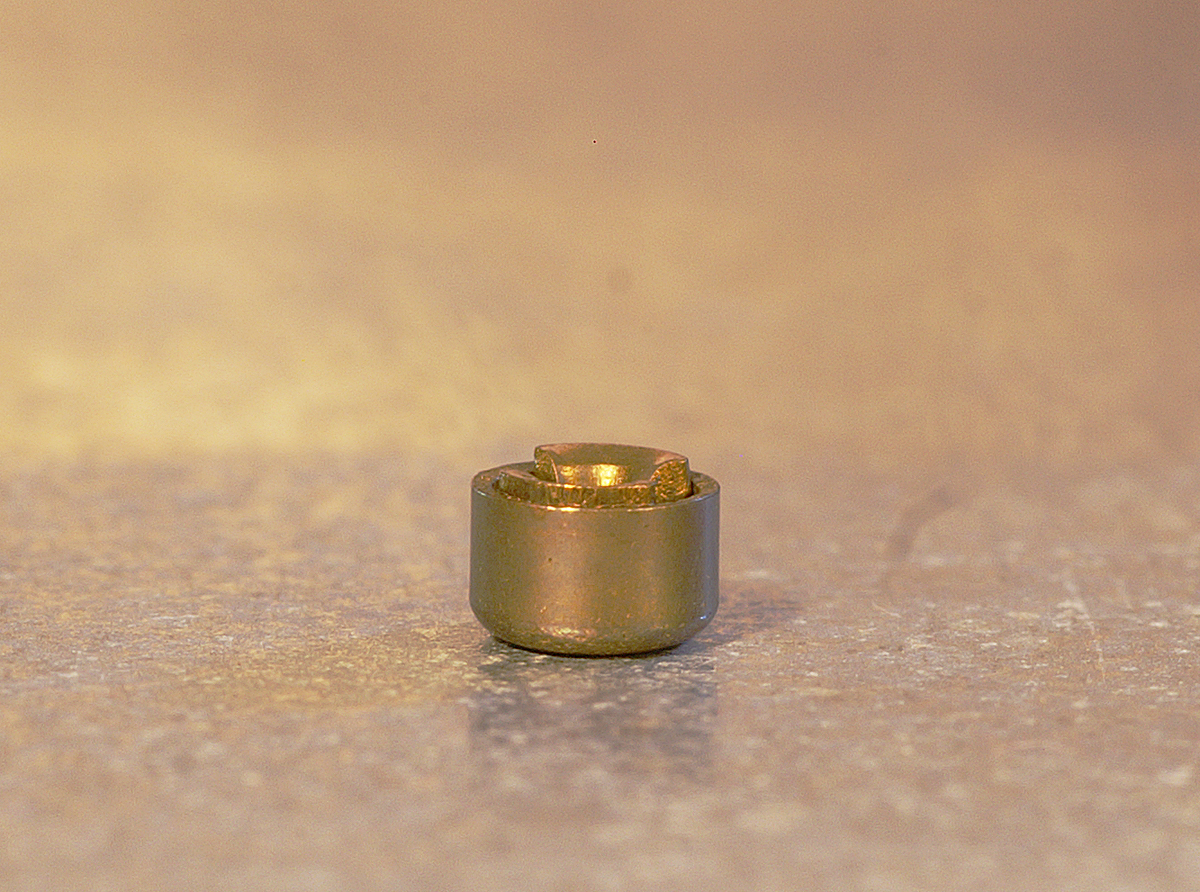
Ideally, a primer will seat flush against the bottom of the primer pocket, with compression, equally of course, against the anvil. Also ideally, there should be some resistance in seating the primer (if there’s not then the pocket has expanded an amount to cause concern, and a rethink on the suitability of reusing this case, and its brothers and sisters).
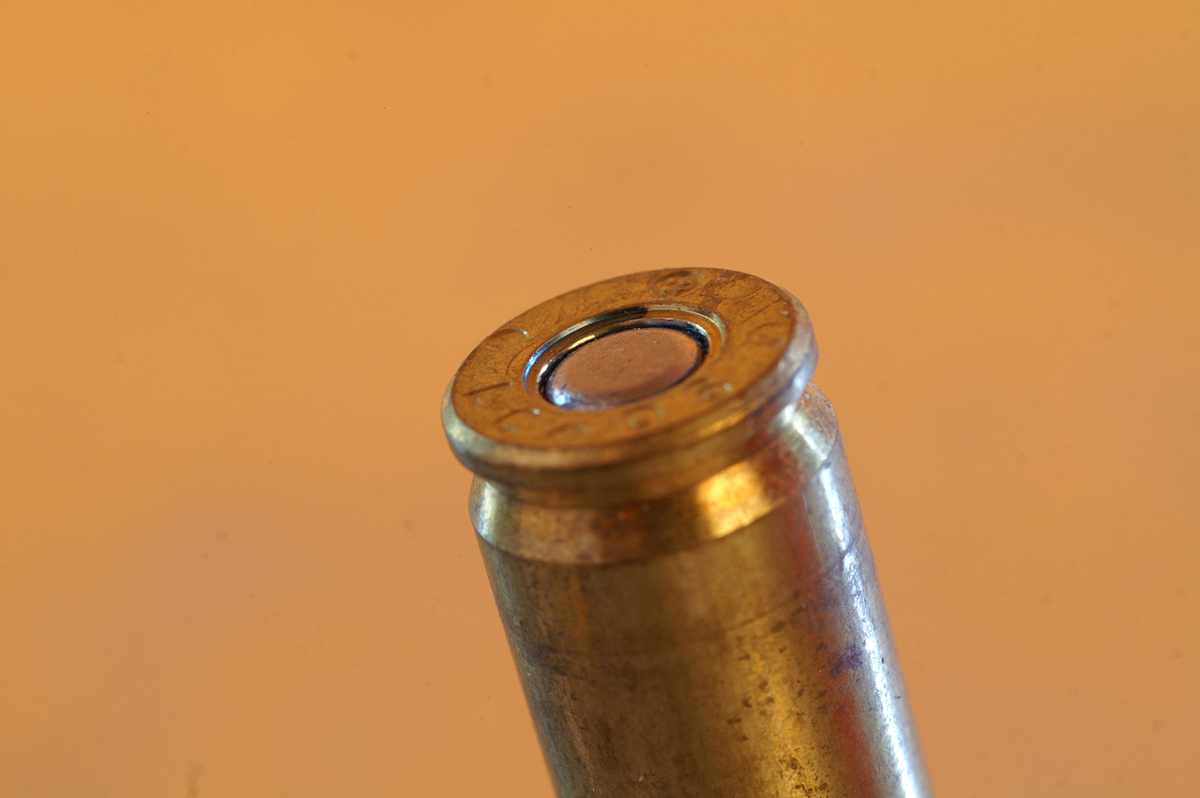
If it has to be a choice, even though it doesn’t have to be, it’s better to have “too much” seating than not enough. The primer cannot (cannot) be left too “high.” That’s with reference to the plane of the case head. There are both safety and performance concerns if it is. First, if the primer is not seated snugly to the bottom of its pocket, then the firing pin will finish the job. No doubt, there will be variations in bullet velocities if this happens because it affects ignition timing.
Each and every loaded round you ever create needs to be checked for this. Every one. Get in the habit of running your finger across the case bottom and feeling a little dip-down where the primer is. Look also. Rounds loaded on a progressive machine are susceptible to high primers. The reason is no fault of the machine but rather because the feel or feedback is that much less sensitive than even when using a press-mounted priming arm. If there are a half-dozen other stations on a tool head in operation at once, then the one doing the priming is that much more obscured from feel. And also because we’re not usually able or willing to inspect each finished round as it emerges from the rotating shell plate. But do check afterwards as you’re filing the loaded rounds away into cartridge boxes. Much more to be said ahead on this topic next edition.
The better priming tools have less leverage. That is so we can feel the progress of that relatively very small span of depth between start and finish. There is also a balance between precision and speed in tool choices, as there so often is. Also, so often, my recommendation is one that hits the best balance.
The press-mounted primer arm styles exhibit variations from maker to maker, but they’re all about the same in function. What matters most in using a press seater is going slowly and double-checking each and every result. Again, it’s the lack of feel for the progression of the primer going into the pocket that’s the issue.
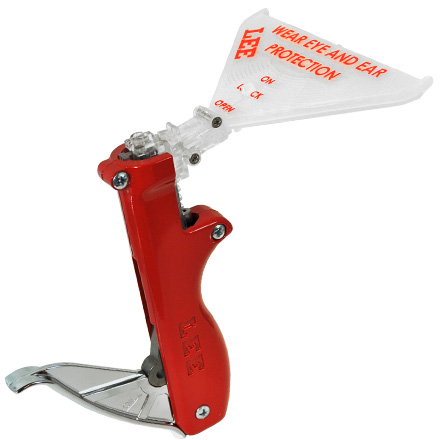
The best way to seat primers, or I should say the means that gives the best results, are the “hand” tools. They are also a little (okay, a lot) tedious to use, and, for me at least, aren’t kind to my increasingly ailing joints after priming a large number of cases. Those types that have a reservoir/feeding apparatus are less tedious, but still literally a pain. The reason these type tools give the best results is that they have poor leverage. The first few times you seat with one, you’ll be amazed at just how much pressure you need to apply to fully seat a primer.
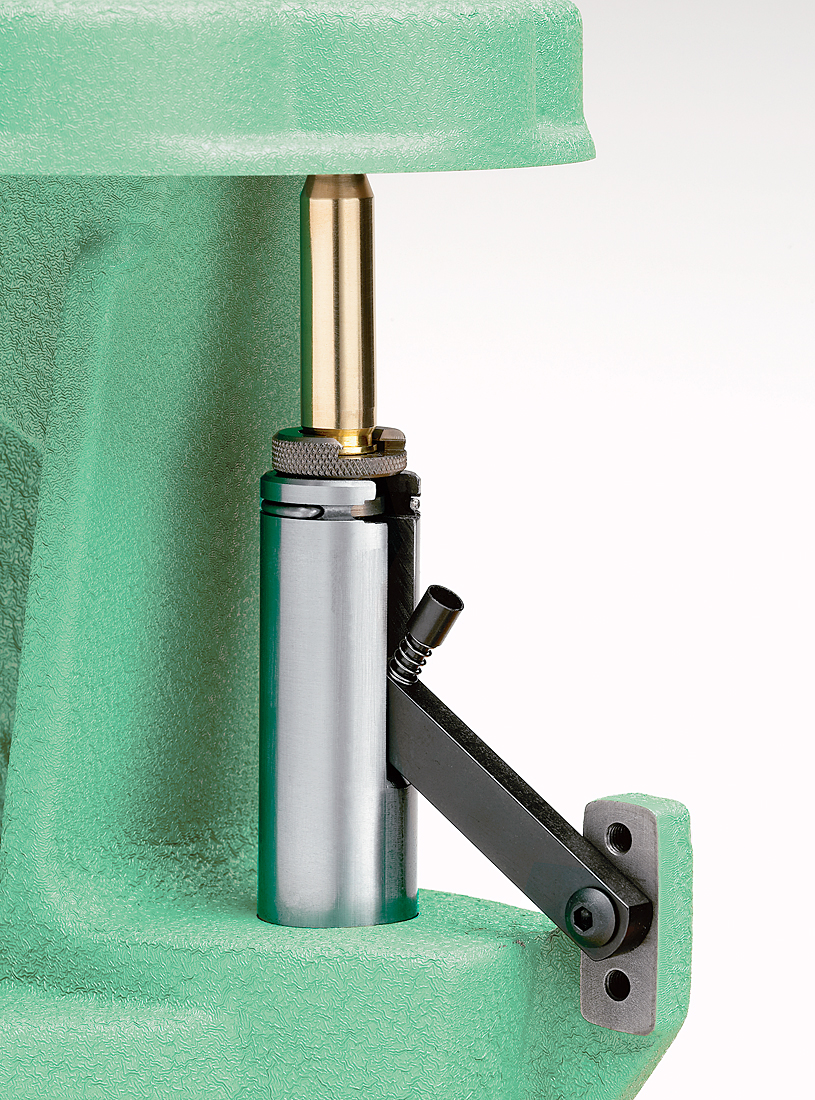
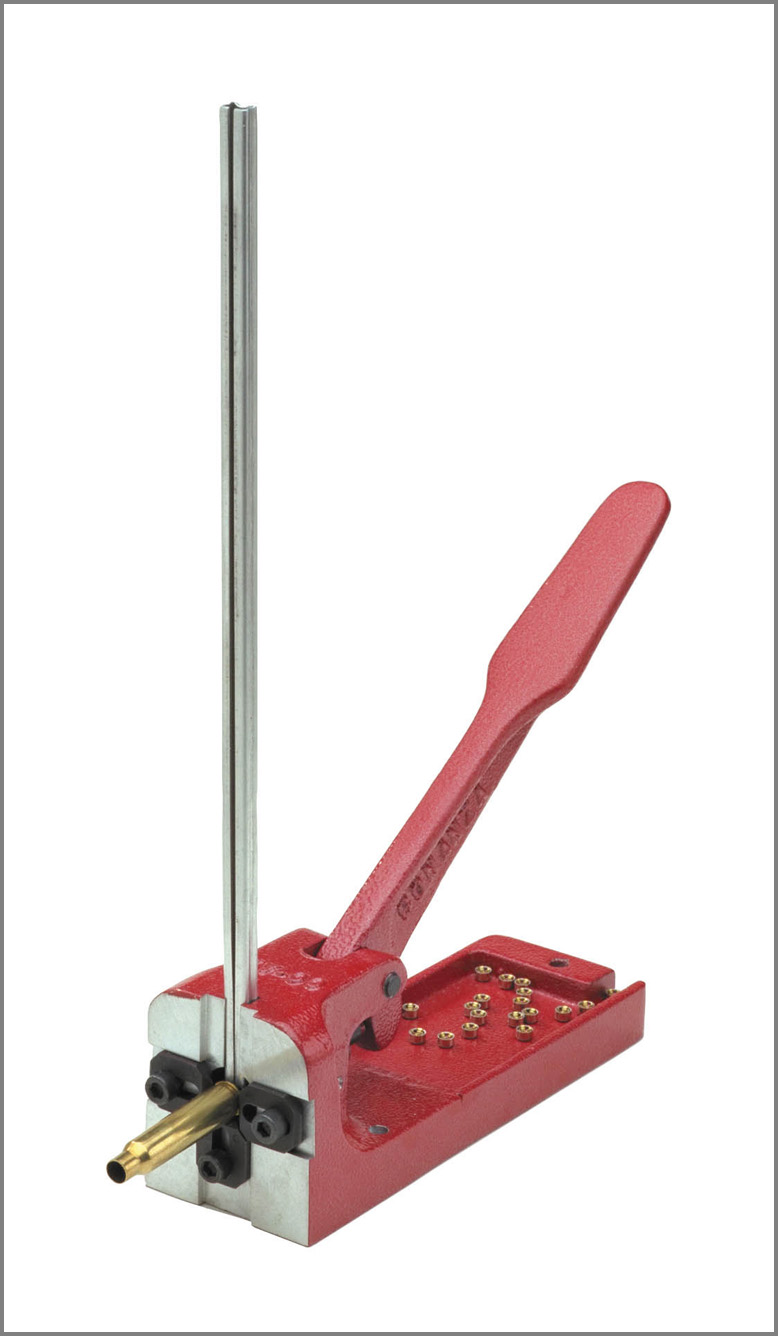
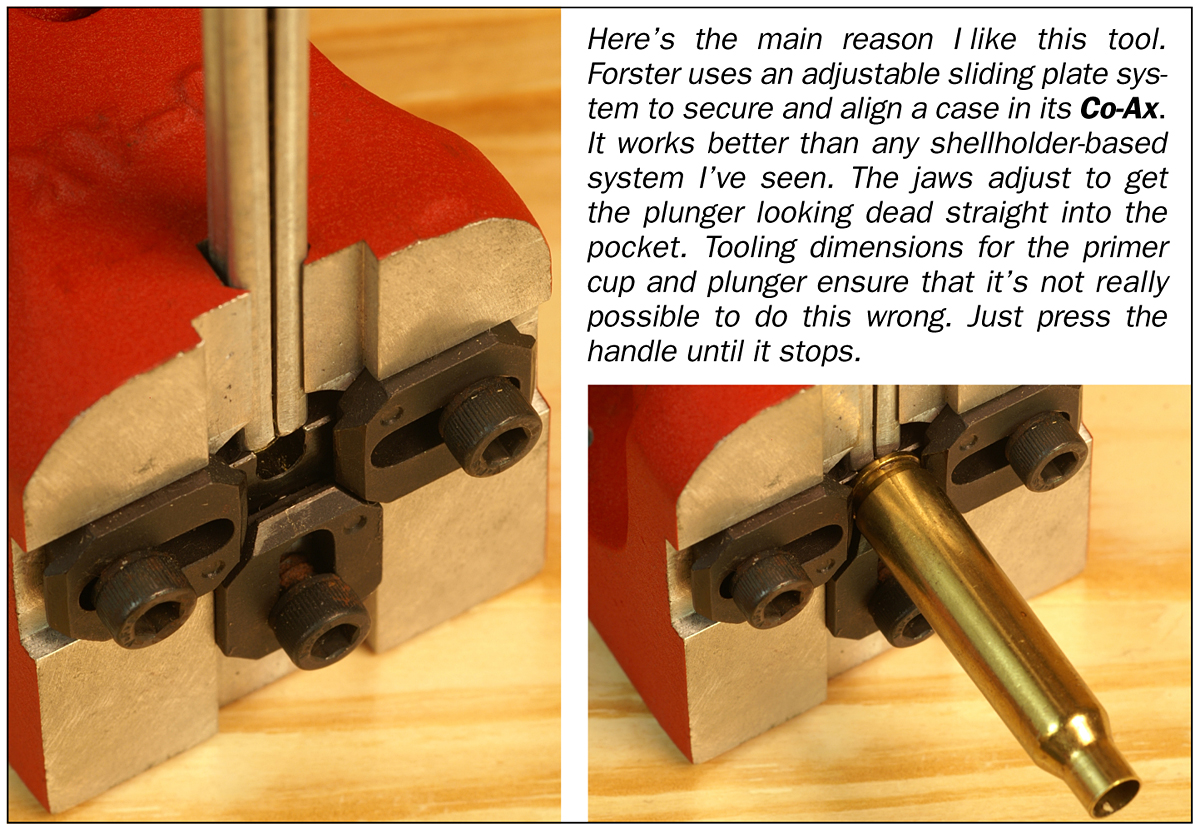
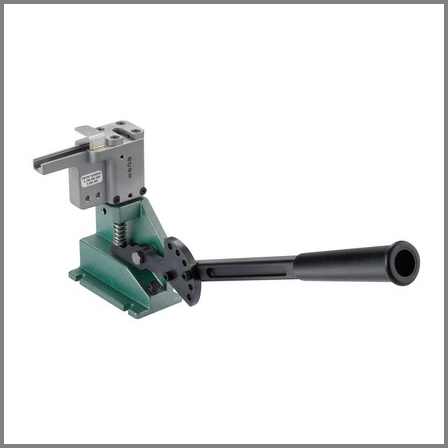
The best choice, in my book, are the benchtop stand-alone priming stations. They are faster than hand tools, and can be had with more or less leverage engineered into them. I like the one shown nearby the best because its feeding is reliable and its feel is more than good enough to do a “perfect” primer seat. It’s the best balance I’ve found between speed and precision.
Get a good primer “flip” tray for use in filling the feeding magazine tubes associated with some systems. Make double-damn sure each primer is fed right side up (or down, depending on your perspective). A common cause of unintentional detonation is attempting to overfill a stuffed feeding tube magazine, so count and watch your progress.
It’s okay to touch primers, by the way. Rumors abound that touching them with bare fingers will “contaminate” the compound and create misfires. Not true. All the primers I’ve ever used, and all those anyone else is likely to encounter, are treated to a sealant. Now, a drop of oil can penetrate the compound and render it intert, but not a fingerprint.
The priming process, step-by-step is almost too simple to diagram. Place a primer anvil-side-up in the device housing apparatus, position a case, push the primer in place. It’s learning feel of the whole thing that takes some effort. As mentioned, using a tool with poor leverage, you might be surprised how much effort it takes to fully seat a primer. On anything with an overage of leverage, there’s little to no sensation of primer movement into the pocket. It just stops.
TWO DONT’S:
Don’t attempt to seat a high primer more deeply on a finished round. The pressure needed to overcome the inertia to re-initiate movement may be enough to detonate it.
Don’t punch out a live primer! That can result in an impressive fright. To kill a primer, squirt or spray a little light oil into its open end. That renders the compound inert.
ONE (BIG) DO:
Keep the priming tool cup clean. That’s the little piece that the primer sits down into. Any little shard of brass can become a firing pin! It’s happened!
See what’s available here at Midsouth HERE
The information in this article is from Glen’s newest book, Top-Grade Ammo, available HERE at Midsouth. Also check HERE for more information about this and other publications from Zediker Publishing.