First off, Skeeter was the nickname of Charles Allen Skelton, a Texican who served as in the USMC, then went into law enforcement. He began as I recall, with the Amarillo PD, then went into the Border Patrol for a time, before becoming a deputy, and then sheriff of Deaf Smith Co., Texas. He next landed a job as an Investigator with U.S. Customs, and wound up his career as SAC (Special Agent in Charge) of the DEA in Deming, NM. Skeeter’s side-job was writing about guns. For a number of years, he was Handgun Editor for Shooting Times magazine, and his writing was partly responsible for the resurrection of the .44 Special cartridge and the Smith & Wesson Model 24 sixgun. I met him in 1982 when I was a rookie Border Patrol Agent in Deming; a memory I hold dear. Sadly, Skeeter passed to his reward in 1988 at the young age of 59.
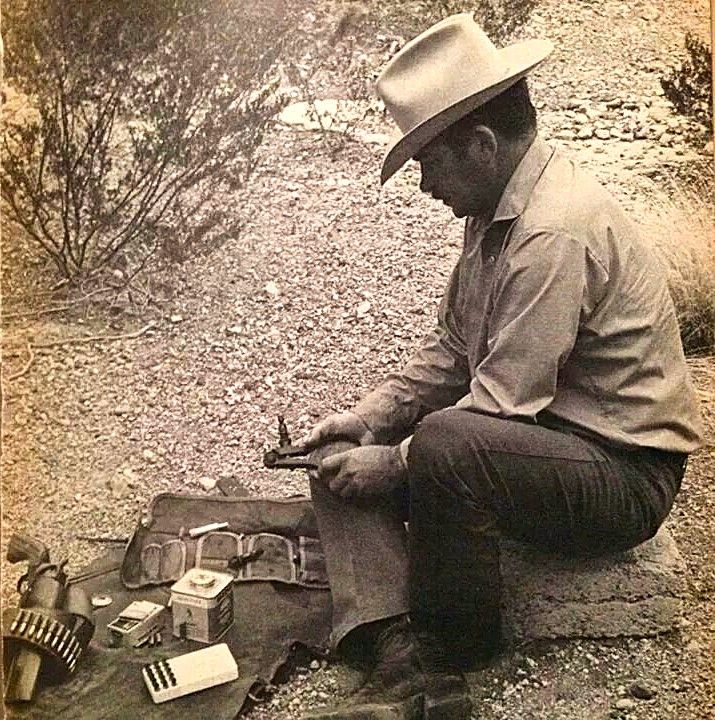
Here, Charles A. “Skeeter” Skelton is putting together some handloads using a portable loading tool at his campsite in the New Mexico desert.
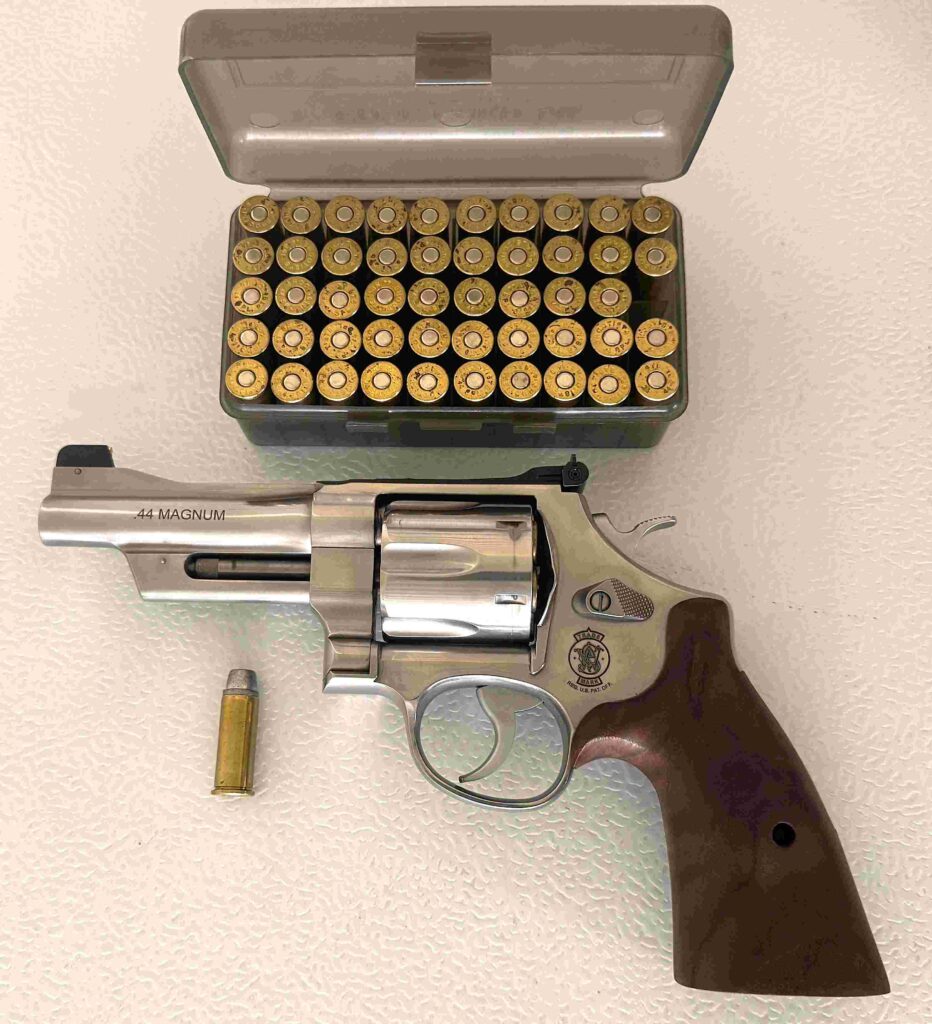
Skeeter was also an avid cartridge reloader. One particular load has been attributed to him and is known among aficionados as the “Skeeter Load.” It is a .44 Special handload the ingredients of which include a 240 gr. lead semi-wadcutter (SWC) bullet, propelled by 7.5 grains (gr.) of Alliant Unique smokeless powder, and a standard large pistol primer. Out of the 4” barrel of my S&W Model 629 Mountain Gun, the velocity is an average 896 FPS. It’s a good all-around load that’s not punishing on the shooter or the gun, yet has enough “umph” to get the job done.
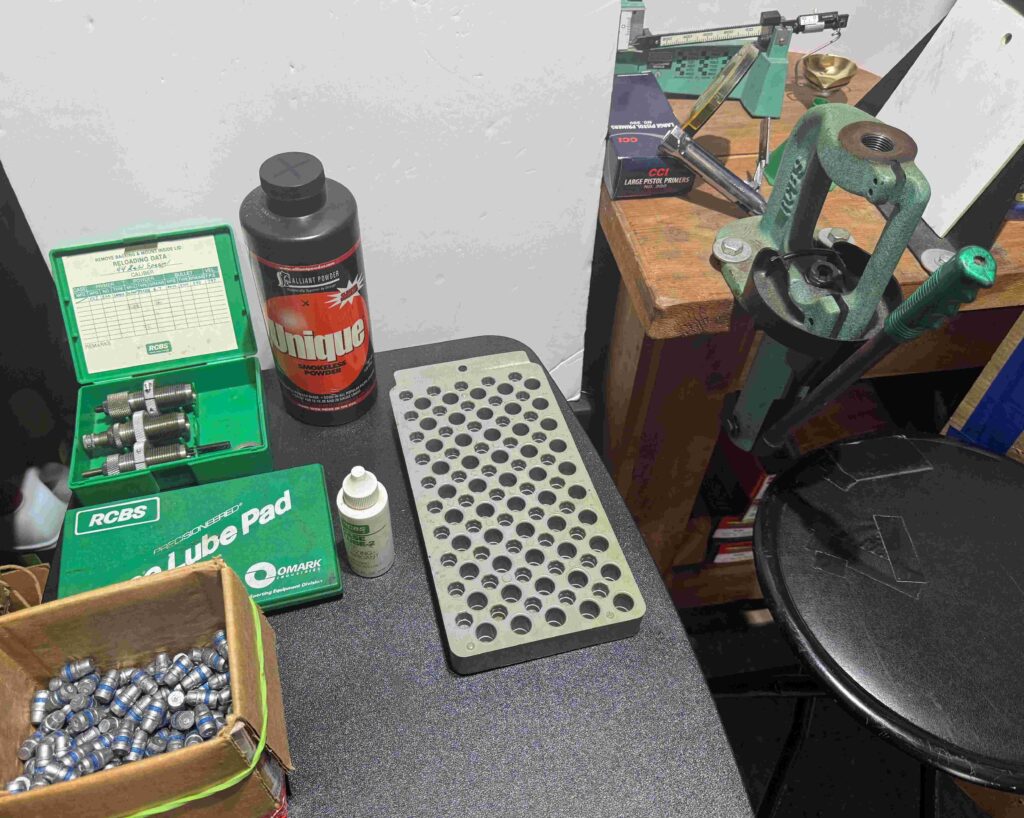
This is my reloading set up with my RCBS single stage press and the most of the other gear and supplies I need to make a handloaded cartridge.
I’ve been a handloader for well over 50 years. I started “rolling my own” because as a young man I couldn’t afford factory ammunition. Handloading is still the best way to go economy-wise; especially for heavy revolver cartridges. Of course there is an initial investment, but it will pay dividends in the end. The best way to get started is to purchase your reloading gear as a set. As I began my reloading career with RCBS products, we’ll go that route. You can get an RCBS single-stage press package deal, that has most everything you’ll need for under $500. Next, you’ll want gun powder, primers, and bullets. These items are more expensive nowadays, but a cannister of powder goes a long way, and primers aren’t as scarce and pricey as they were a couple of years ago. Commercial cast lead bullets are also easy to find and fairly inexpensive. Shop around on the net.
![]()
A good handloading manual is essential to the cartridge reloader; don’t trust the advice you see on the Internet.
If you didn’t get a handloading manual in your gear package, buy one! They are packed full of information you will need. I’m just going to give you a rough sketch of the steps involved in making a “Skeeter Load;” you’ll need more in-depth material. This is a fun hobby, but mistakes and inattention can lead to serious accidents. Use loads that are recommended in the manual, don’t trust what you see on the Internet. I’ve had accidents with guns, but one thing I haven’t done is blow up a gun with a bad reload. One other tip, when you go to buy dies, get the set that has a carbide sizing die. A regular steel die will require the empty cases to be lubricated, which is a messy and tedious chore. My .44 Special dies aren’t carbide, so trust me, I know.
You’ll need to mount your press. I started out C-clamping mine to a sturdy table. Later, my wife blessed me with a nice bench. Make sure you have enough room to operate the press handle. The first die you will use is the sizer/de-capper. It will full-length re-size your empty cartridge case and push out the spent primer. Screw the die into the hole in the top of your press. Adjust the die so that the bottom is about a nickel’s width between the bottom of the die and tubular press ram. Your die set should include a shell holder, which fits into the top of the ram to hold the cartridge case in place. Adjust the de-capper pin so that it doesn’t protrude too far; just far enough to punch out the old primer. I always do 50 cases at a time on my old RCBS Rock Chucker Jr. single-stage press. A universal loading block to hold the cases is also a much-needed piece of equipment.
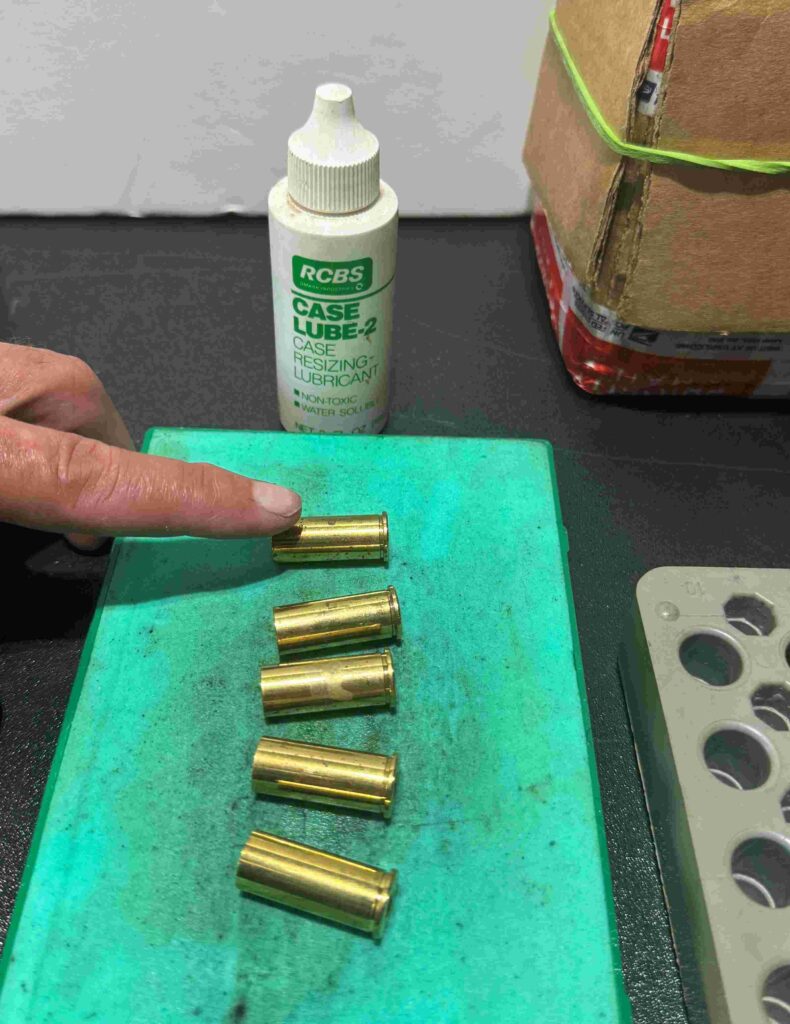
As they didn’t have carbide dies 50+ years ago when I started to reload, I still have a few carbon-steel dies I use; so, I have to lubricate the cases on this pad.
My next step is to expanded the case mouth. There is a die in your set especially made for this. Adjust it so that you only “bell” the case mouth just enough that the bullet will sit just inside the top of the case. Over-expansion will stretch the case mouth and decrease the life of the case. You should get over 10 re-uses of a case before the mouth starts to split. With your 50 cases “belled,” it’s time to prime the cases. The .44 Special uses large pistol primers; other calibers like the .38 Special use a small pistol primer. You won’t need “Magnum” primers for this load. A hand priming tool is the way to go. My old press once had a primer “arm” used to seat primers that were held in a tube; it was a pain. Once I got a hand priming tool, I never looked back. I load the tools tray with 50 primers. Be sure they are all face-up. An upside-down primer won’t work. The priming tool also needs a shell holder; the best thing to do is get a shell holder set; it will have holders for just about any case that you’re trying to reload.
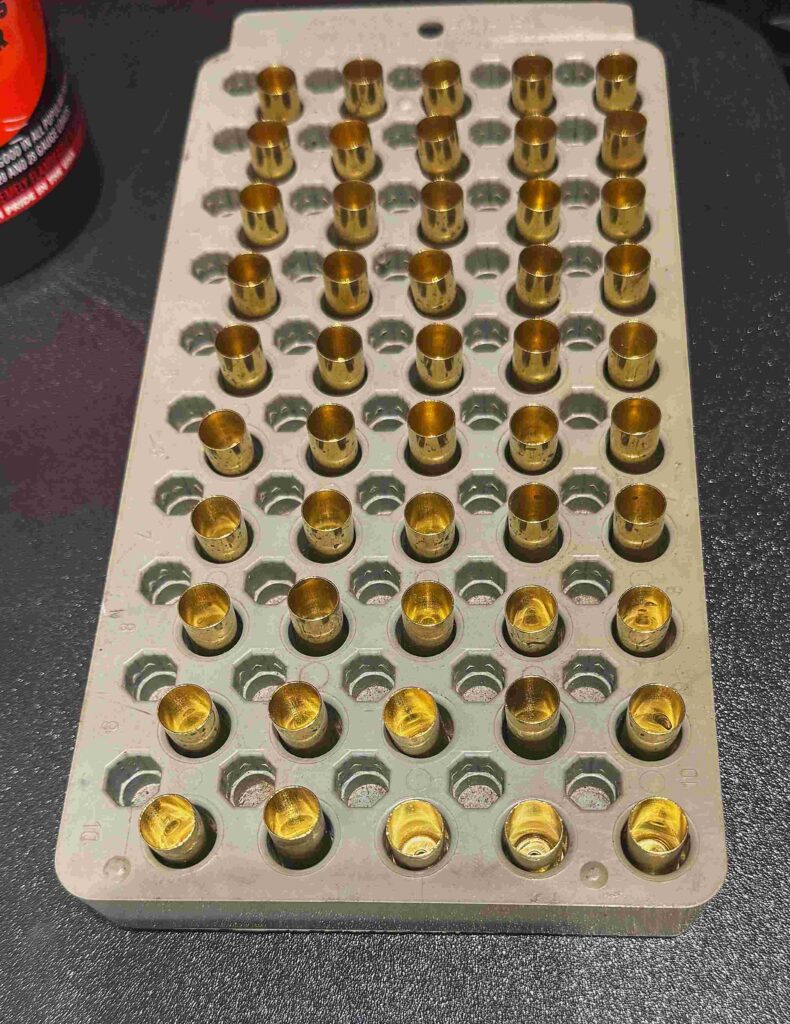
This is a universal loading block; it will hold your cartridge cases as you go through the several steps in the handloading process.
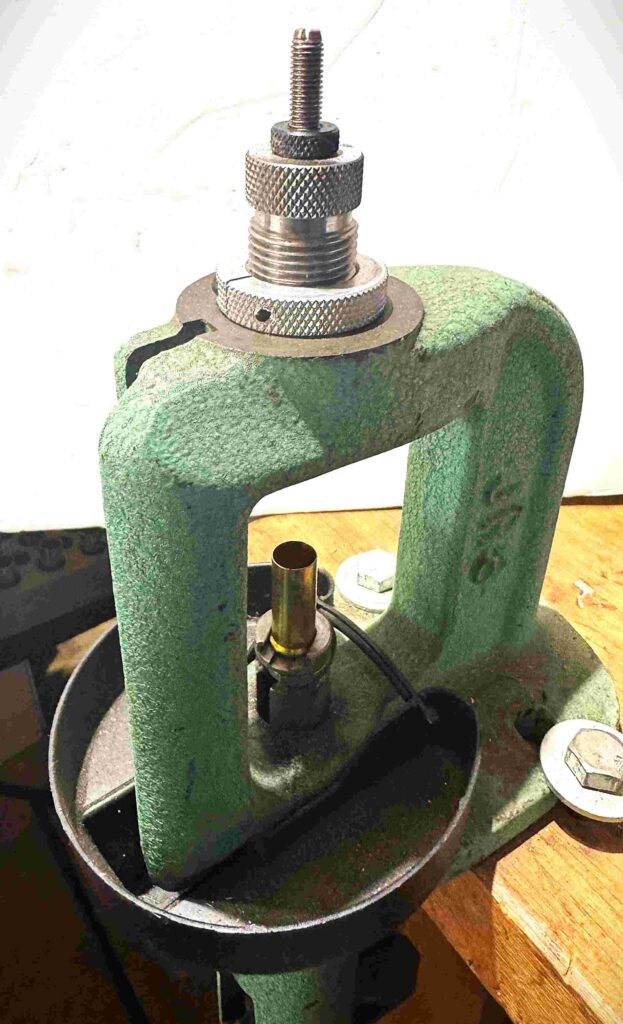
The sizer/de-capper die is in the press and a case is in the shell holder on top of the press rammer; this die will re-size the case and push out the spent primer.
Time to put gun powder in the cases. Now, things get a little tricky. While there are electronic scales with digital readouts, I’m a “Fudd/Boomer” and still use a tried-and-true balance-beam scale. You most first get it leveled and zeroed. This done, you set it for the powder charge you want. In this case it will be for 7.5 gr. of Unique powder. If your gear set didn’t come with a drum-type powder measure, you’ll want one. I have an RCBS Uni-Flo; it is also mounted on your table. It has two screw-in nozzles; you’ll want the larger diameter one for the .44 Special. The measure has a handle you move up and down, and dispenses the powder out of the nozzle. A screw and collar assembly allows you to adjust your powder charge. It’s a trial-and-error thing. Turn the screw out a few increments, lock it with the collar, and throw a powder charge into the scale pan. Put the pan on the scale, and you can tell if you have too much or too little powder. You will have to keep adjusting the measure and weighing the charge until you have the right amount of powder “thrown” when you work the measure handle.
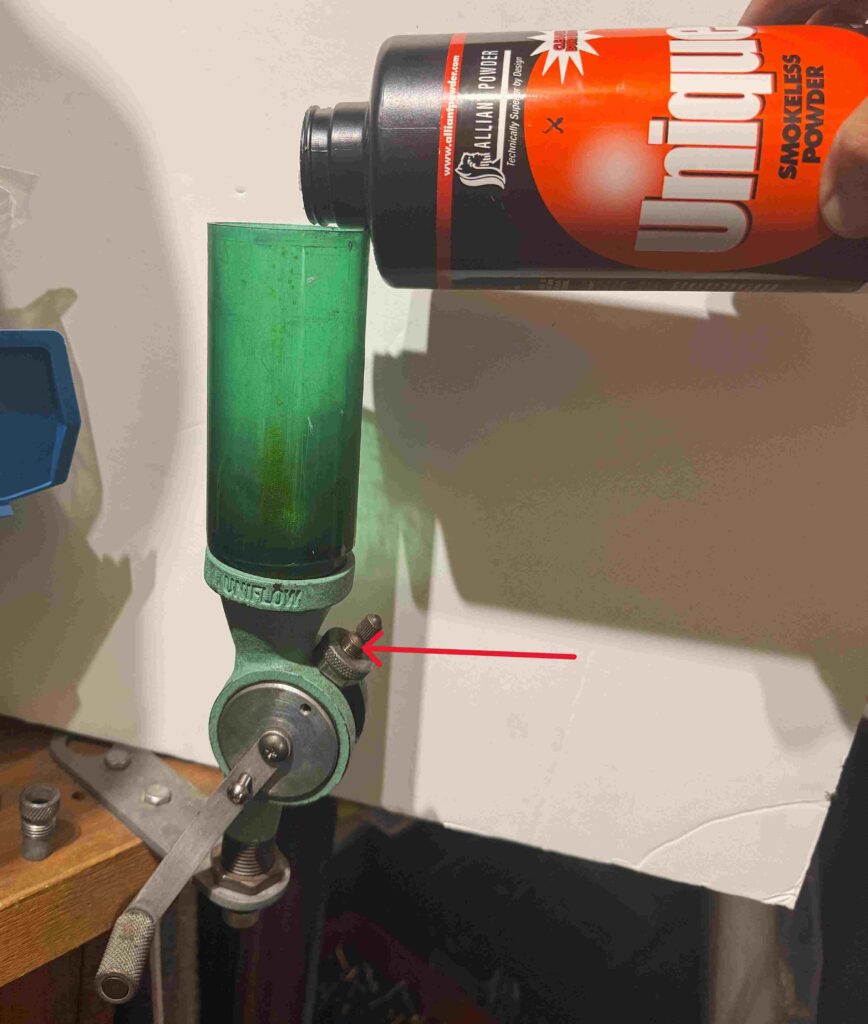
Here, Unique powder is poured into the hopper of the powder measure; the red arrow points to the adjustment assembly that is used to set the powder charge.
With your cases in the loading block, you can run them under the measure nozzle one at a time, and work the handle to release ONE powder charge into each case. This is where you DON’T want to get distracted. Most likely, you will only be able to charge the cases on the outer portion of the block. I re-check the powder charge with my scale about every 5 cases to make sure the measure hasn’t changed. Keep those locking collars tight. Move the charged cases inside and the empties outside until you have all 50 done. Now, do a visual to see if all the cases have powder and none have a double load. If all is well, it’s time to seat your bullets.
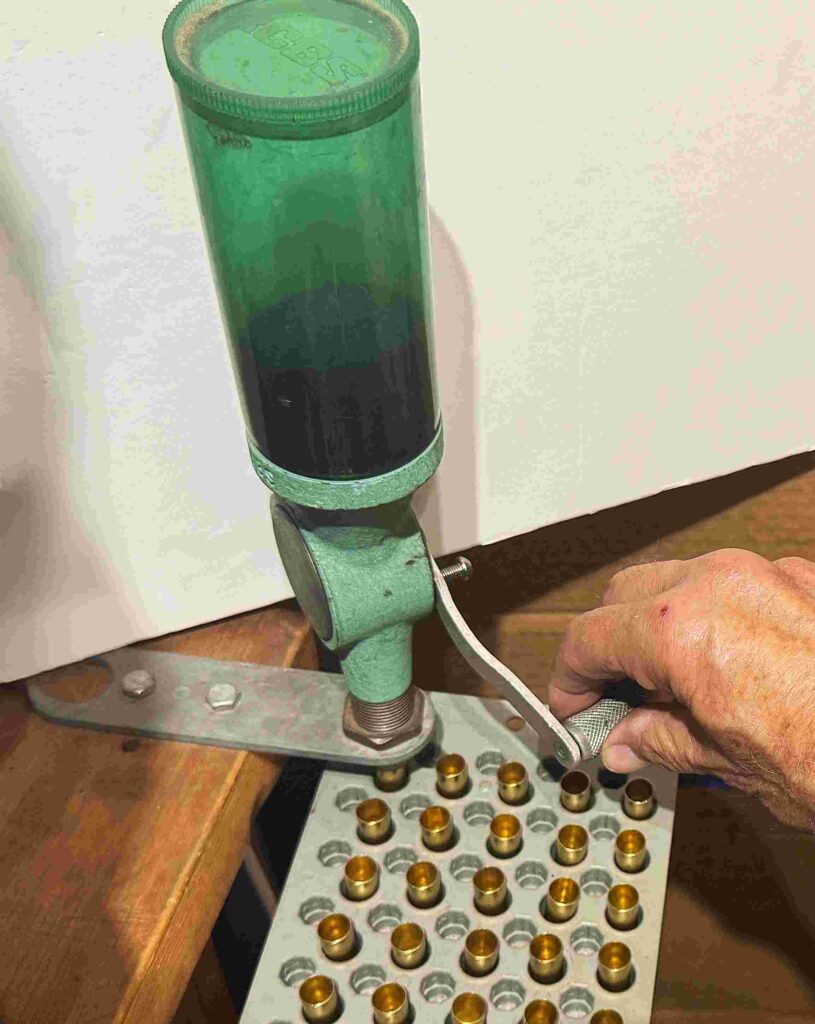
With the powder measure set properly, charges can now be dispensed into the cases; do a visual to see that all cases have powder and none are double-charged.
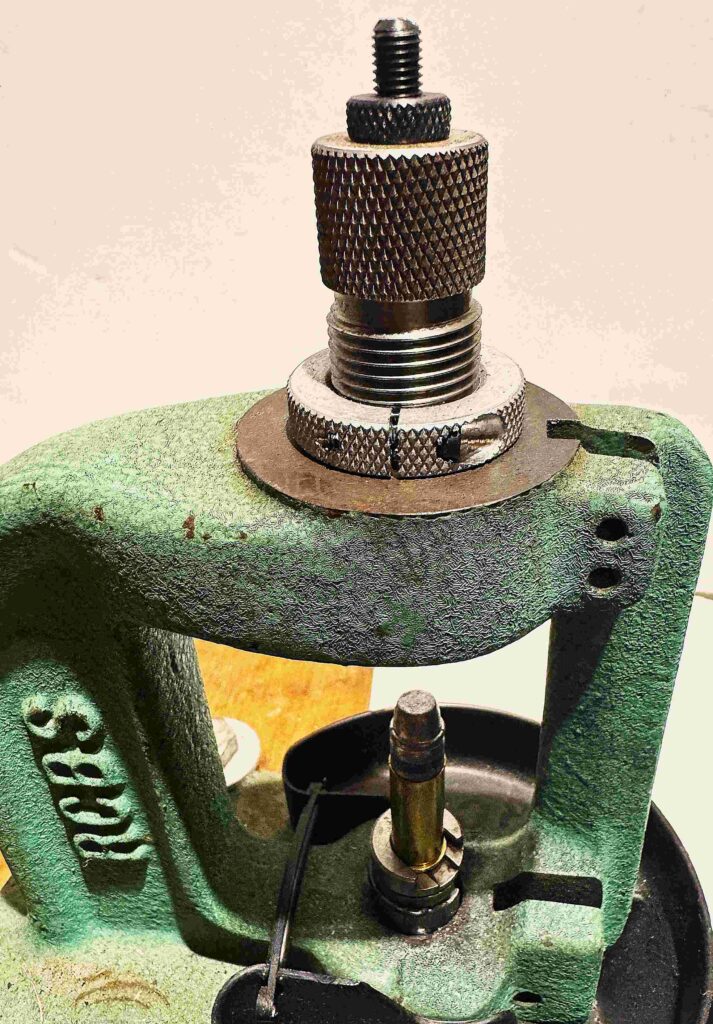
The case is in the shell-holder, the bullet on top of the case mouth, ready to be pushed into the seating/crimping die; the die must be adjusted properly.
For this, you will use your seating and crimping die. This final step also requires some “finagling.” The die should come with two bullet pushers; one is rounded on the inside and one is flat. For a SWC bullet, you’ll want to screw in the flat one. Screw the die in, but once again, leave about a nickel’s width between the rammer and the bottom of the die. The bullet pusher and the die both have locking collars and you will have to adjust how far down to screw the die and the pusher to get the bullet to the right depth in the case mouth. The bullets I use have a crimping groove which is just above the groove with the bullet lubricant. Going a little at a time, screw down the bullet pusher until the bullet crimping groove is just above the case mouth. Now, you will want to screw in the die until you can feel the bullet making contact with the pusher. The die depth controls the amount of crimp applied to the case mouth. This crimp is what helps to hold the bullet in place. What’s called a “roll crimp” is generally used for revolver cartridges. Please, do yourself a favor and read that reloading manual. With slow trial and error, you will seat the bullet to the proper depth and apply the right amount of crimp. When you have the right combination tighten your locking collars.
You have just made a box full of “Skeeter Loads” and it’s time to head to the range and see how they perform.
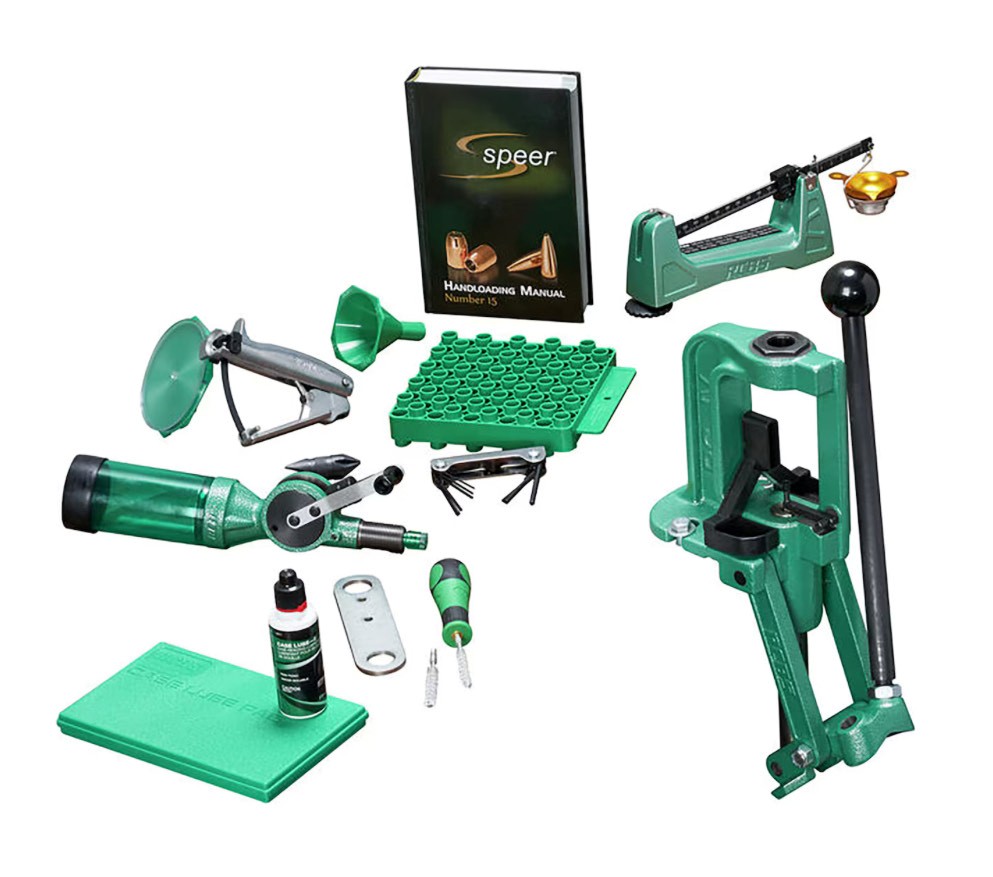
This packaged set of RCBS reloading equipment retails for under $500, and has most of the gear you need to start handloading.
You have just produced a “Skeeter Load.” Now to head out to the range and give your new handloads a try. I hope this article has been helpful to you new or perspective handloaders. There are lots of steps in the process, so be sure and read your manual and the instructions that come with the gear. This would be a much longer article if I went into the “minutia” of the whole process; so, treat this simply as an introduction and not as the last word on handloading. Be careful, patient, and have fun!