
In the high-stakes, hyper-focused world of ammunition reloading, we often find ourselves obsessing over the minutiae. We argue for hours in online forums about the measuring consistency of various powder throws; we spend small fortunes on digital calipers that can measure the wings of a flea; and we treat our choice of die sets with a level of reverence usually reserved for family heirlooms. Yet, standing beneath all this sophisticated machinery, bearing the weight of our ambitions and our literal heavy metal, is the most unsung hero of the workshop: the reloading bench.
If the press is the heart of the reloading process, the bench is most certainly the skeleton. It is a humble assembly of plywood, lumber, and an optimistic amount of wood screws, yet it serves as the literal base upon which your entire ballistic future stands. It is the building block of the reloading journey, tasked with the Herculean labor of supporting hundreds of pounds of cast iron, lead, copper, and the volatile goodness of primers and powder.
The Philosophy of the Bench
For the uninitiated, the prospect of designing a bench might seem like a secondary concern—a mere weekend project to be knocked out before the real fun begins. This is a dangerous fallacy. If you are new to the craft, the planning phase of your bench is a fork in the road. One path leads to a lifetime of ergonomic bliss and organized efficiency; the other leads to a permanent backache and the inevitable loss of a critical, tiny spring into the dark abyss of a cluttered floor.
On the other hand, if you are an experienced reloader—which is often a polite industry term for someone who has more gray hair than unspent primers—you know that a bench is never truly finished. It is a living organism. You are constantly tinkering, bracing, drilling new holes, and wondering where on earth you are going to fit that new trimming tool.
There is a golden rule in the world of reloading that mirrors the logic of buying a gun safe. If you calculate that you need a 24-gun safe, you should immediately purchase the 48-gun model, because your collection will expand to fill the void. The same applies to your workspace. When you envision your ideal bench, take that mental image and double the surface area. Between the mounting of multiple presses, the storage of bullets that weigh as much as a small toddler, and the ever-growing hoard of brass, you will never find yourself complaining that you have too much room.

Architectural Dimensions and the Pursuit of Space
The question of how big is too big is largely a philosophical one. In the context of a reloading room, the answer is usually governed by three factors: the physical dimensions of your walls, the limits of your bank account, and the specific level of tolerance exhibited by your significant other before they stage an intervention.
To simplify the construction process and maximize material efficiency, many seasoned builders adhere to the 4×4 or 4×8 standards. Since plywood is traditionally sold in 4×8-foot sheets, the 4×4 design is a masterclass in simplicity. You take one sheet, cut it squarely down the middle, and you have a top and a bottom shelf ready to go. Frame it with 4×4 posts for legs and you have a sturdy, compact workstation that can handle the torque of your stage press without flinching.
However, if you are feeling particularly ambitious—or have “main character energy”, as the kids say—the full 4×8 bench is the gold standard of the reloading lifestyle. This behemoth provides a sprawling landscape of productivity. It allows for the mounting of multiple progressive presses with ample breathing room in between—ideally three feet—ensuring you aren’t bumping elbows with one machine while operating another. A bench of this magnitude provides a permanent home for the peripheral cast of characters: the ultrasonic cleaners, the case trimmers, and the various scales that require a level, vibration-free surface to function accurately.
The Vertical Frontier
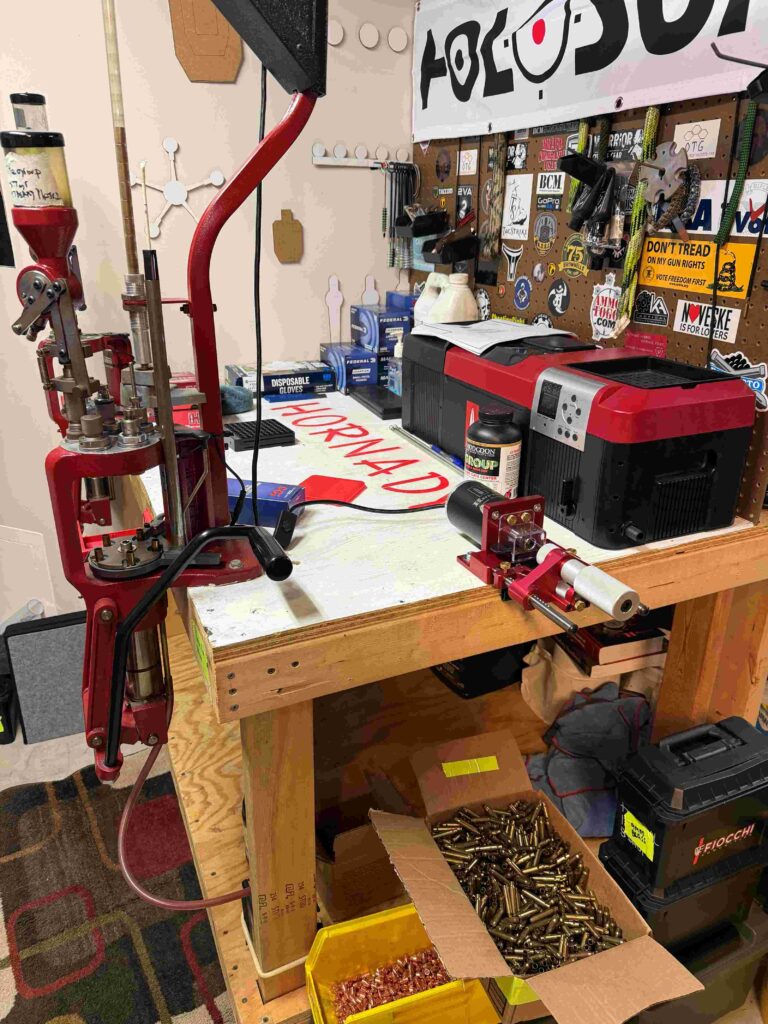
In the quest for efficiency, one must eventually look upward. Just as urban planners in crowded cities build skyscrapers to accommodate growing populations, a reloader must utilize vertical space to accommodate a growing addiction to components. This is why a bottom shelf is non-negotiable. It provides a low-center-of-gravity storage area for heavy items like lead ingots or bulk projectiles, which actually serves to further stabilize the bench during high-torque operations.
For the rear of the bench, consider using 2×6 or 2×8 lumber for the legs. By allowing these supports to extend well above the tabletop, you create a natural frame for a backsplash of pegboard or slatwall. This is where you can mount bins for brass, racks for wrenches, and shelves for manuals. In the reloading world, if an item isn’t at eye level or neatly binned, it effectively ceases to exist until the moment you buy a replacement, at which point the original will miraculously reappear.
Aesthetics and the Science of Visibility
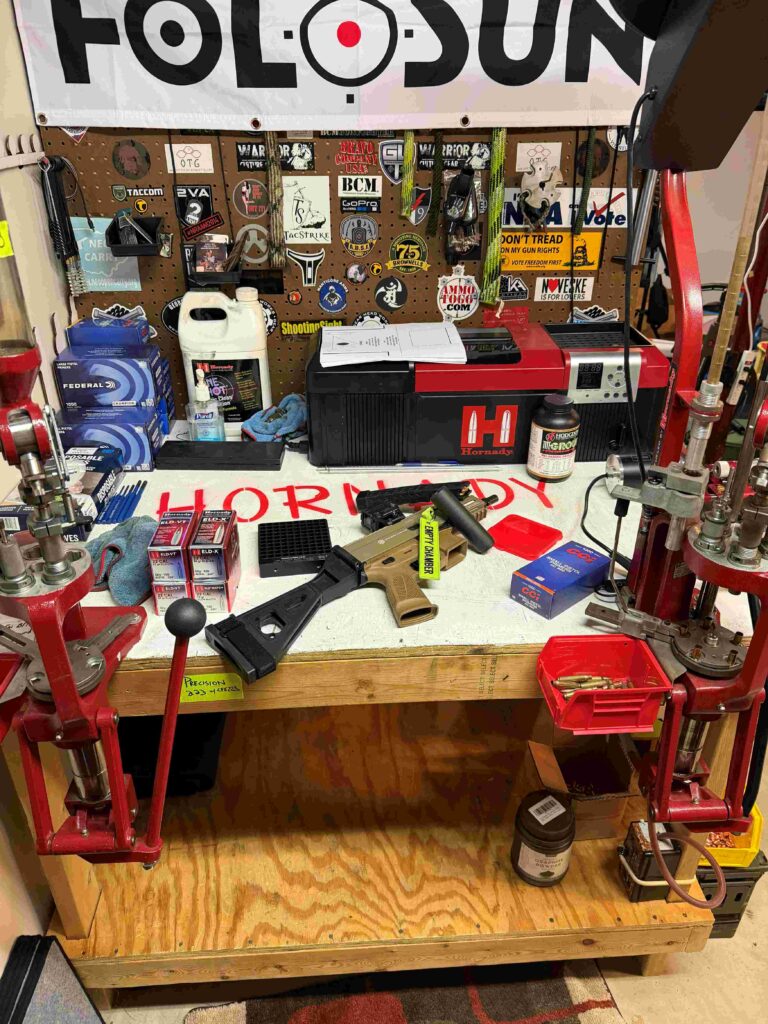
Once the structural integrity is sorted, many reloaders assume the job is done. This is where the amateurs separate from the professionals. There is a very practical reason to be fancy with your finish. I am a staunch advocate for painting the bench top a bright, clean, light color—specifically white.
Now, you might ask why one would paint a pristine white surface only to subject it to graphite powder, spilled grease, and the occasional fist-slam of frustration when a primer pocket is too tight. The answer is simple: visibility. When you inevitably drop a microscopic set screw or a tiny spring, a dark wood grain is a black hole. On a white surface, that tiny part stands out like a beacon of hope.
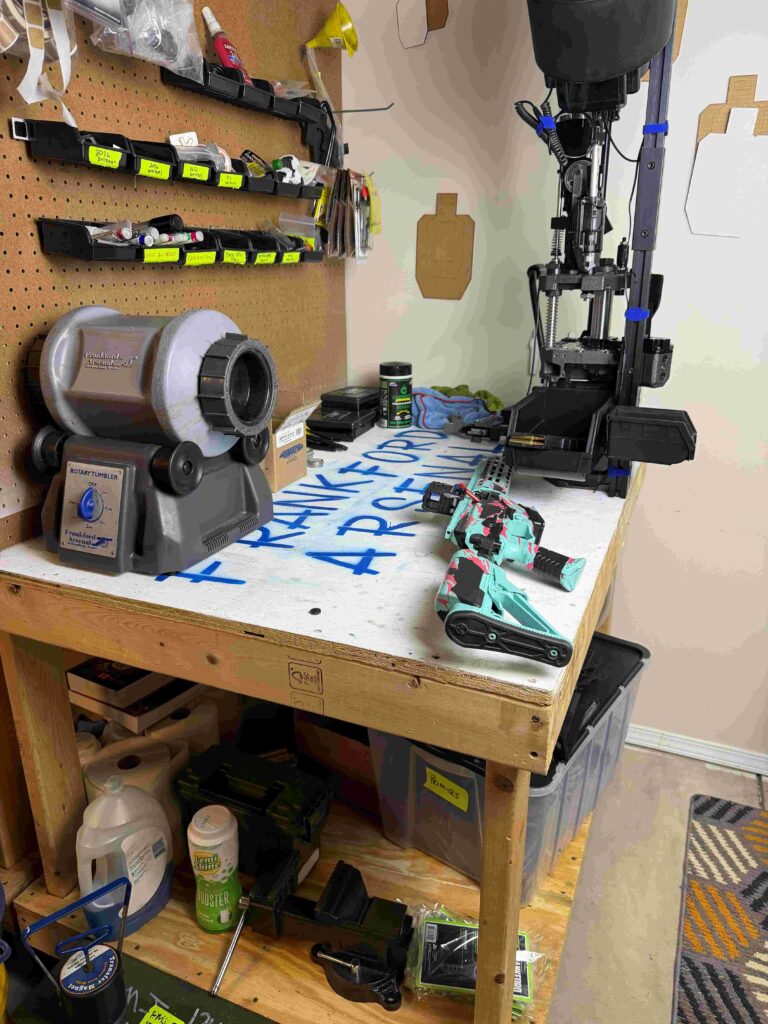
For those who appreciate a bit of aesthetic flair, you can take it a step further. I personally enjoy color-coding my workstations. My Hornady bench features the brand name in a bold red; the RCBS station is adorned in classic green; and the Frankford Arsenal area is designated in blue. Once the branding is applied, a thick clear coat is essential. This creates a slick, non-porous barrier that makes wiping up spilled powder a breeze and ensures the wood doesn’t soak up oils over the decades.
The Final Amenities
As you prepare to make your pilgrimage to the local hardware store, there are a few final items to add to your list that go beyond lumber and lag bolts. The modern reloading bench is a powered entity. You will need electricity for press lights, digital scales, trimmers, and perhaps most importantly, a speaker for the music or podcasts that keep you company during a marathon session of processing 5.56 brass.
A pro tip for the sophisticated builder is to mount power strips underneath the lip of the table or along the inner frame. This allows for superior cord management, keeping the surface of the bench clear of “spaghetti” and preventing you from accidentally snagging a wire while moving a heavy tray of cartridges.
Ultimately, remember that your bench is an evolving project. When I started, I was working on a cramped corner, saving every penny for a single press and a pound of powder. I could not have envisioned a future where seven different presses occupy my shop and my collection of Hodgdon powders alone requires its own zip code.
Your needs will change as you move from basic pistol plinking to long-range precision rifle loads. Your bench should be able to grow with you. It is more than just a table; it is the altar of the tinkerer and the laboratory of the marksman. Build it strong, build it large, and build it with the knowledge that you are creating the foundation for every bullseye you will ever hit.
Now, go forth to the lumber yard and start building the reloading sanctuary you deserve.