It’s the “last thing” that happens in handloading, and here’s a few ways to make it better. READ MORE
Glen Zediker
Last time the topic was bullet seating, but with a focus on safety — respecting the overall cartridge length that touches the lands or rifling in a barrel — and specifically making sure your bullet isn’t touching the lands (unless that’s what you want). This time here are a few ideas on how to improve the quality and consistency of bullet seating, and mostly from a tooling perspective.
A few things matter. The ultimate goodness is a round capped by a bullet that’s straight and undamaged, ready to get launched straight into the bore and then straight on to target center.
1. Die Design
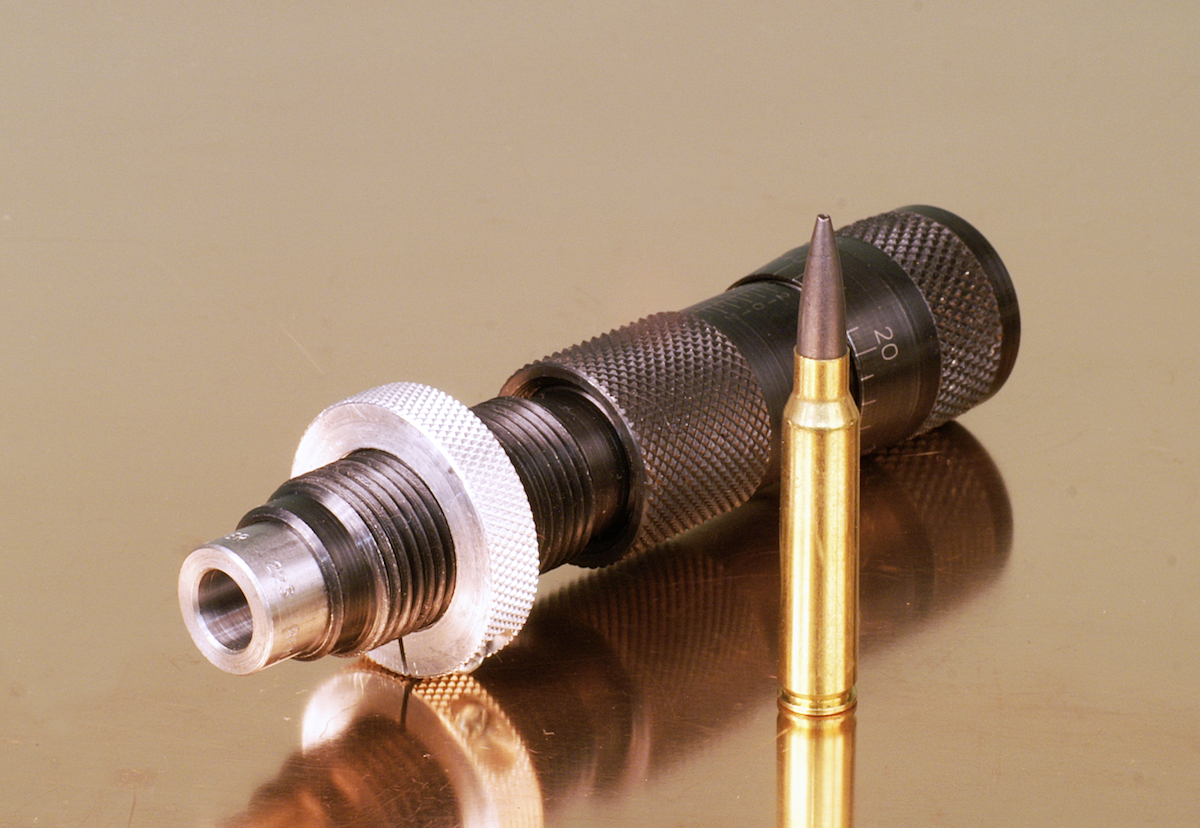
I have long and often said that the single-most important tooling upgrade to improve the accuracy of handloaded ammunition is a better seating die. “Better” is better designed, and better designed, in my mind, is one that follows the “in-line” architecture.

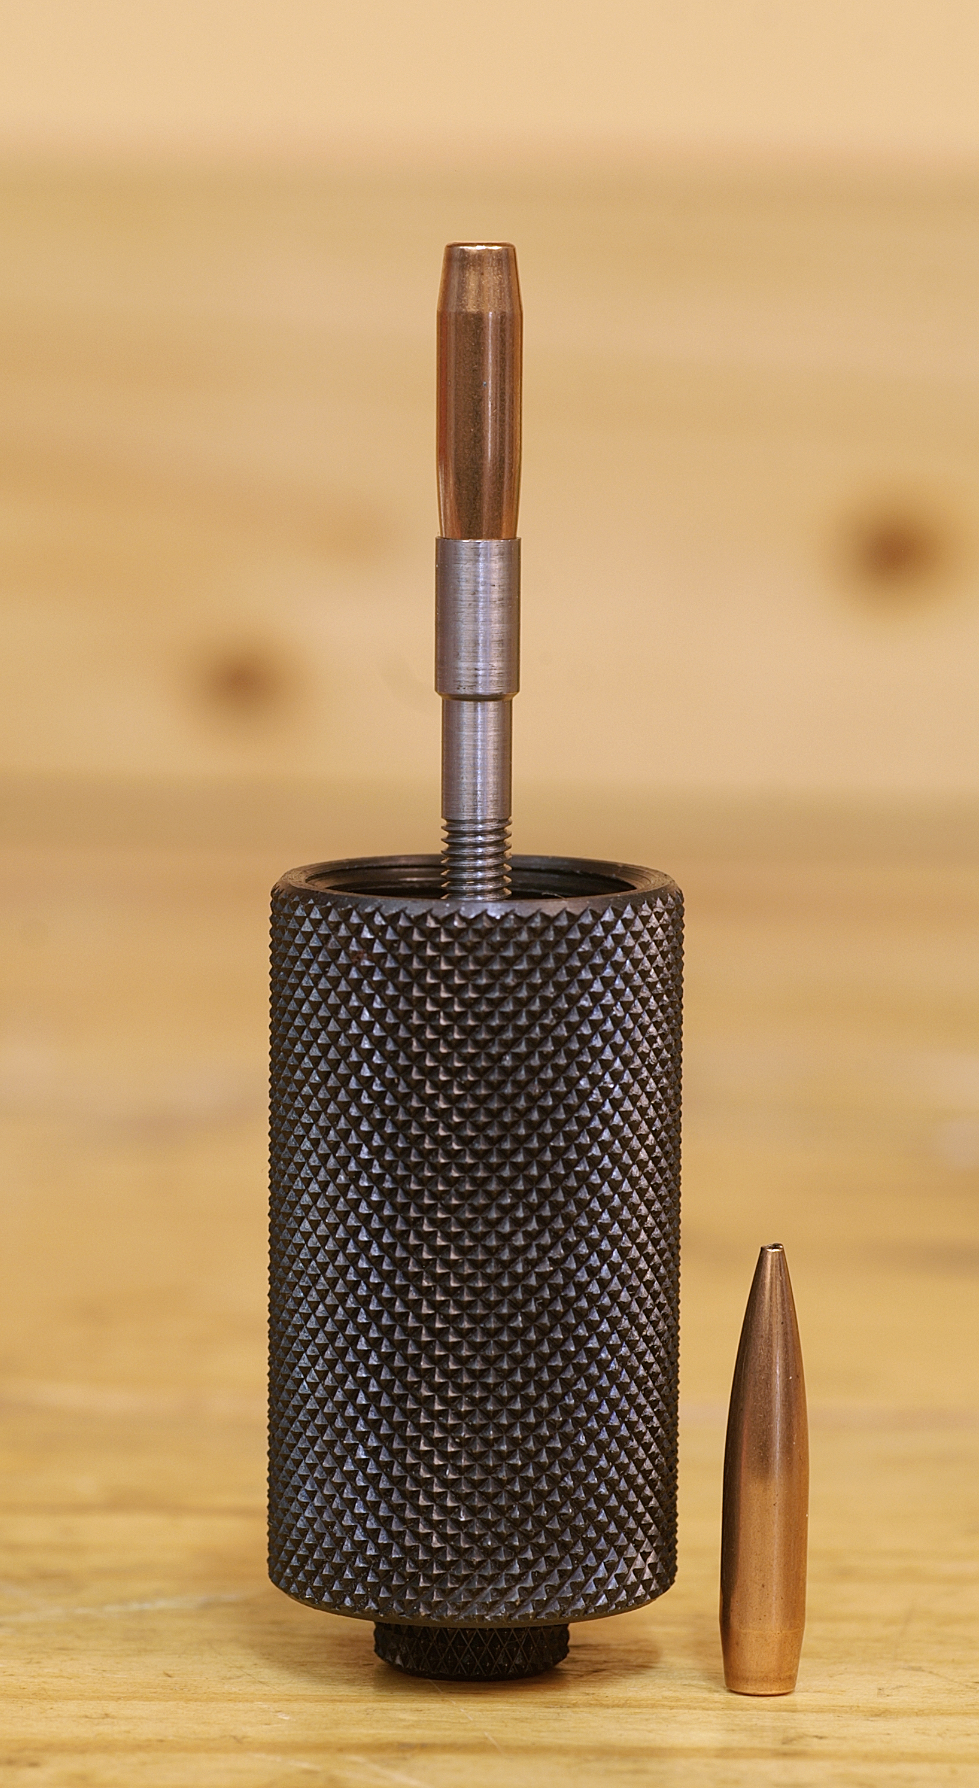
One of the first that comes to mind is the LE Wilson seater (there are others similar, but it’s the most well known). This seater style is the staple of Benchrest competitors. It’s not practicable for the most of us because it’s slow and a little tedious. How it works is that there is a seating stem that’s a very close fit to the die body. The die body and stem are concentric thanks to precision machining. The die body goes over the case, which has had a bullet placed in its neck, and the die holds the case in stable alignment. The stem is pushed down, seating the bullet. There’s zero “wiggle room.”
The difference in effect between that and a “standard” seating die, which has a stem threaded into a 7/8-14 press-mounted die body, is that the case isn’t free to move. In a conventional thread-in design, there’s a lot of room for movement in the case as it’s being run up into this type die. There’s slack in the case-shellholder fit, and slack in the fit of the case inside the die body. When the bullet that’s perched in the case mouth contacts the seating stem there’s a good chance it can get tilted askew. That then means there’s a good chance the bullet won’t be seated dead straight.
Redding and Forster both make a press-mounted die that effectively duplicates the in-line Wilson concept. These both have a spring-loaded sleeve that tightly fits the case body. The idea is that the case fully enters this sleeve and is therefore fully supported against movement before the press handle stroke elevates the ram enough for the bullet to engage the seating stem. Much better!
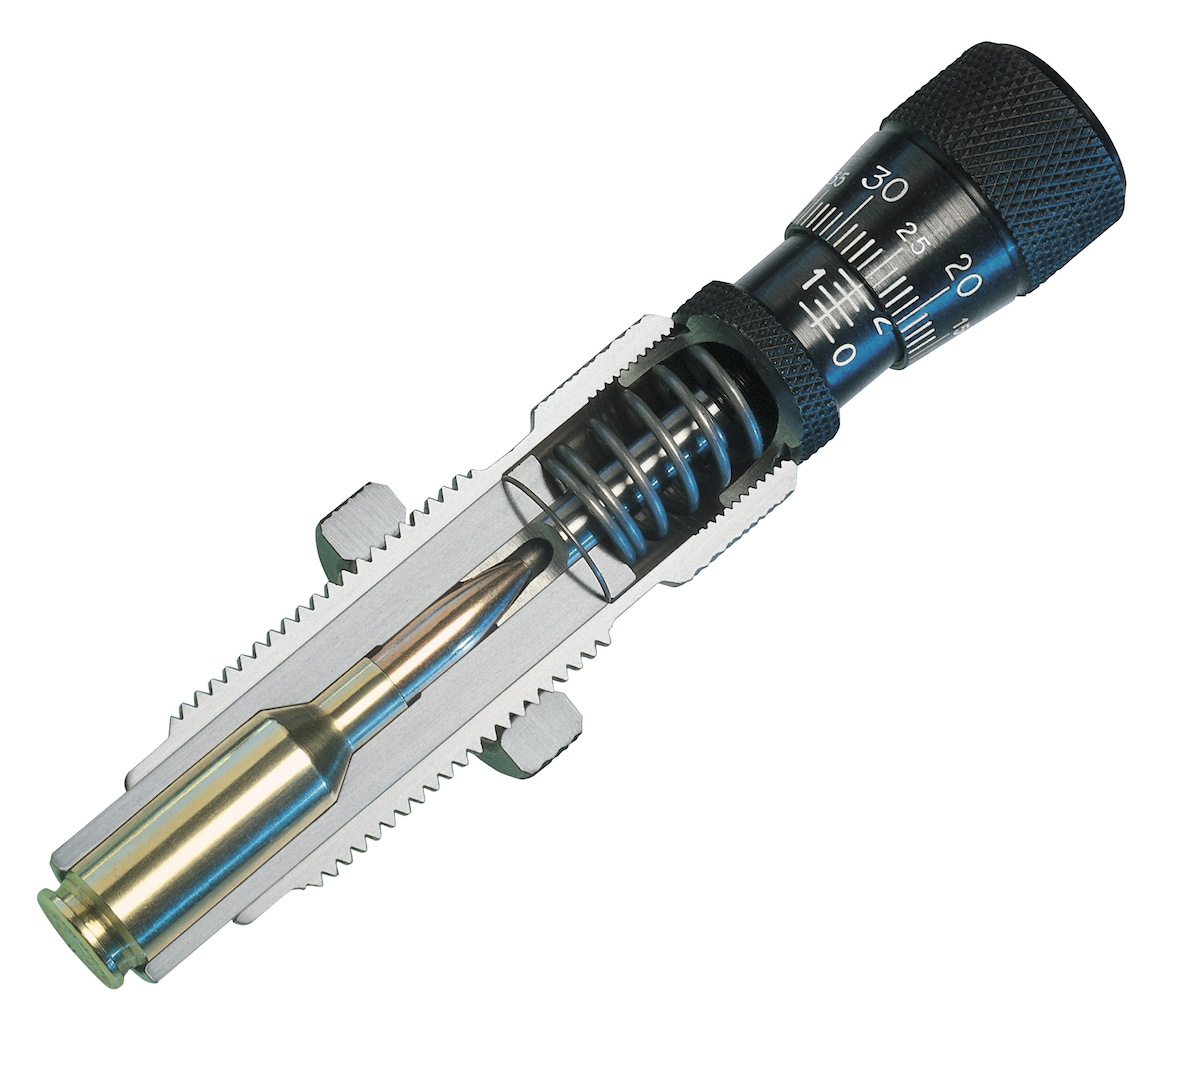
2. Stem Check
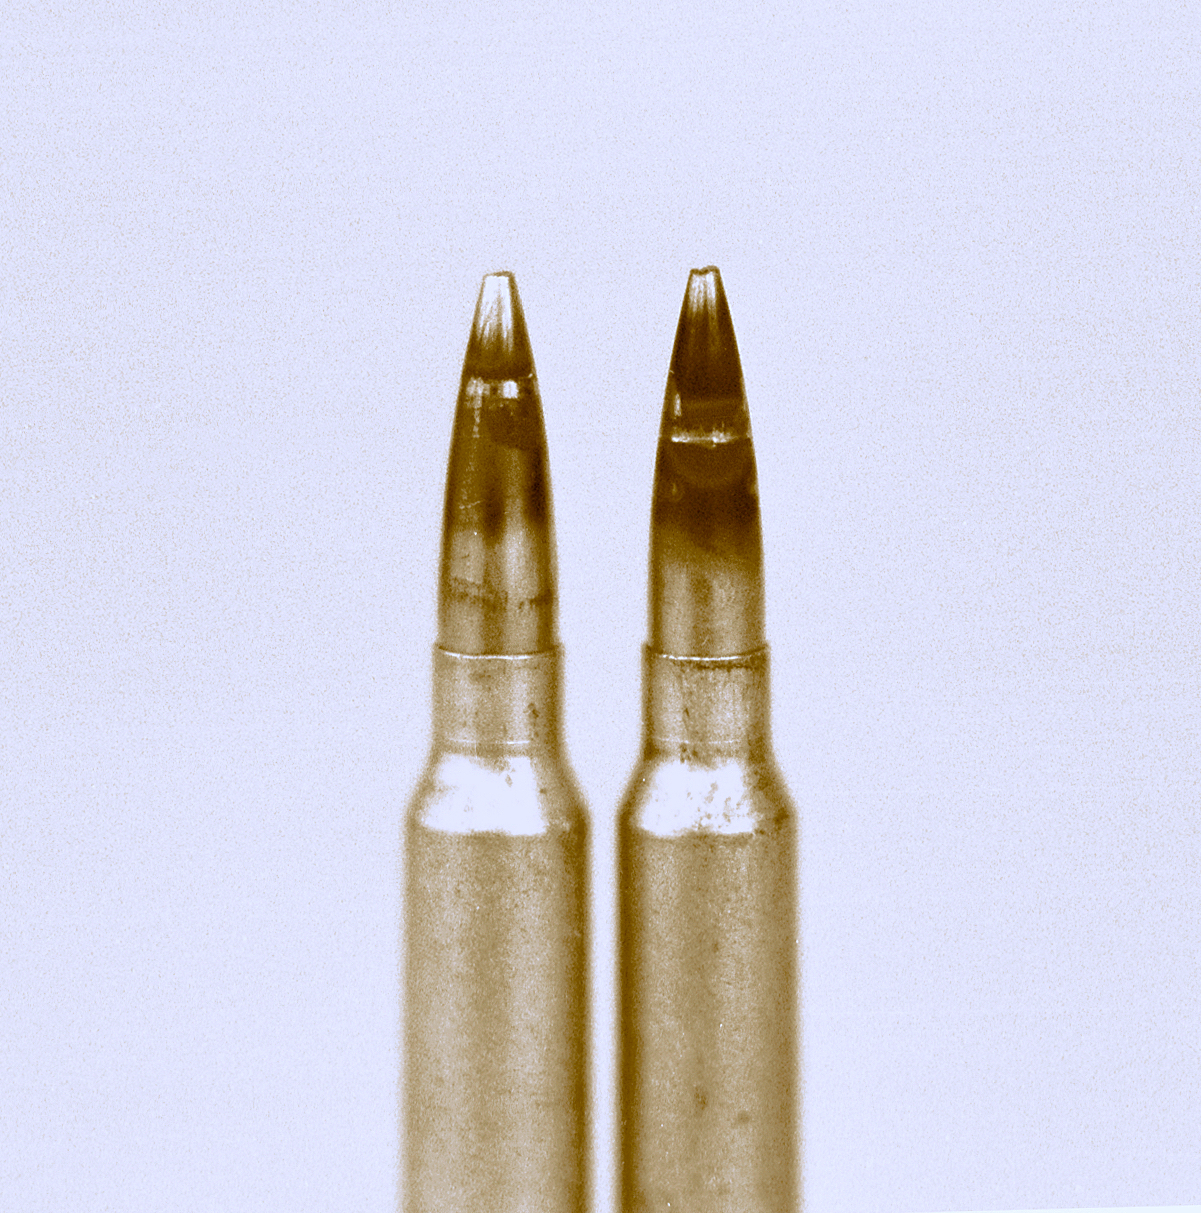
Make sure that the tip of the bullet you’re using doesn’t contact the inside of the seating stem! This isn’t as common to see now as it once was. Longer, higher-BC type bullet profiles are prevalent enough that most manufacturers have increased the room inside the stem.
Certainly, if the tip is bottoming out inside the stem, a few bad things can happen. One is that it’s easily free to tilt the bullet. Two is that the seating depth is then influenced by the tip-to-tip inconsistencies that do exist. Three is that the tip might get damaged in the process. This, by the way, is not nearly exclusively a concern to users of “spikey” bullets. I’ve been running into tip contact created by bullets with more blunt/rounded nosecones, like some of the lighter-weight .308 caliber bullets we’re using in .300 Blackout.
There’s more, though. A seating stem that contacts a bullet farther down its nosecone provides more stability during seating. It’s a greater surface area and that is another hedge against the potential for unwanted tilting.
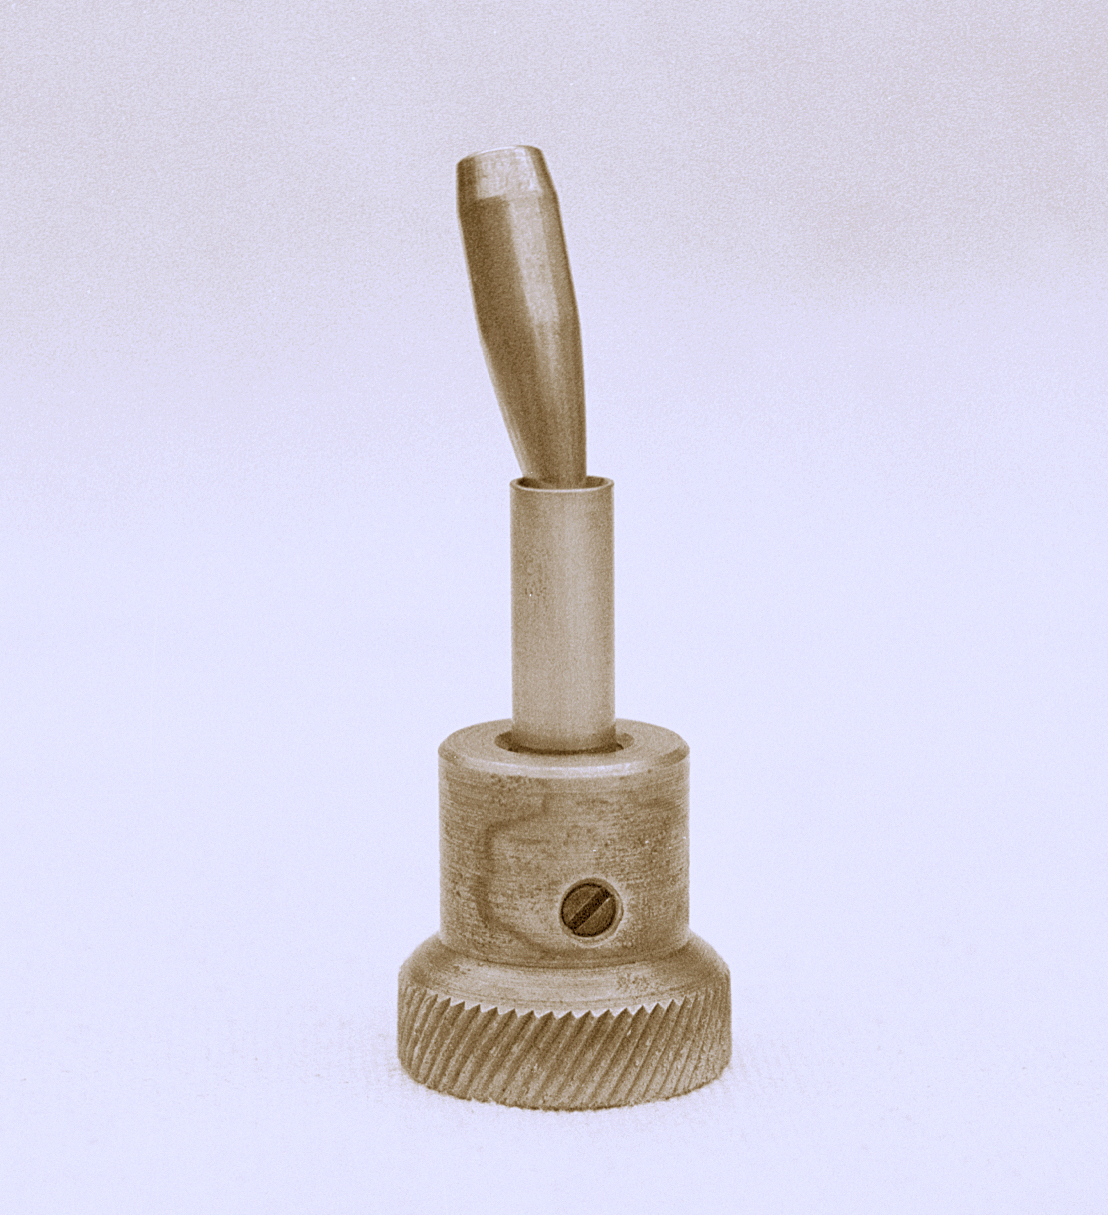
If you’re a Forster user, they have a custom seating stem option I have been increasingly using. Send a bullet and they’ll custom-made a polished stem that exactly fits it, and in the right place.
3. Start it Right
Can bullets be damaged in seating? Yes. Absolutely. Especially some of the thinner-jacketed bullets can get scuffed during seating, and the stem can leave a ring indentation on the ogive. Some swear that the ring indentation is not hurting accuracy; I say, “I don’t know, but it can’t help.” A stem that’s a little larger inside diameter, that’s also been smoothed to a gentle radius, will make the ring disappear. A good local machinist can help.
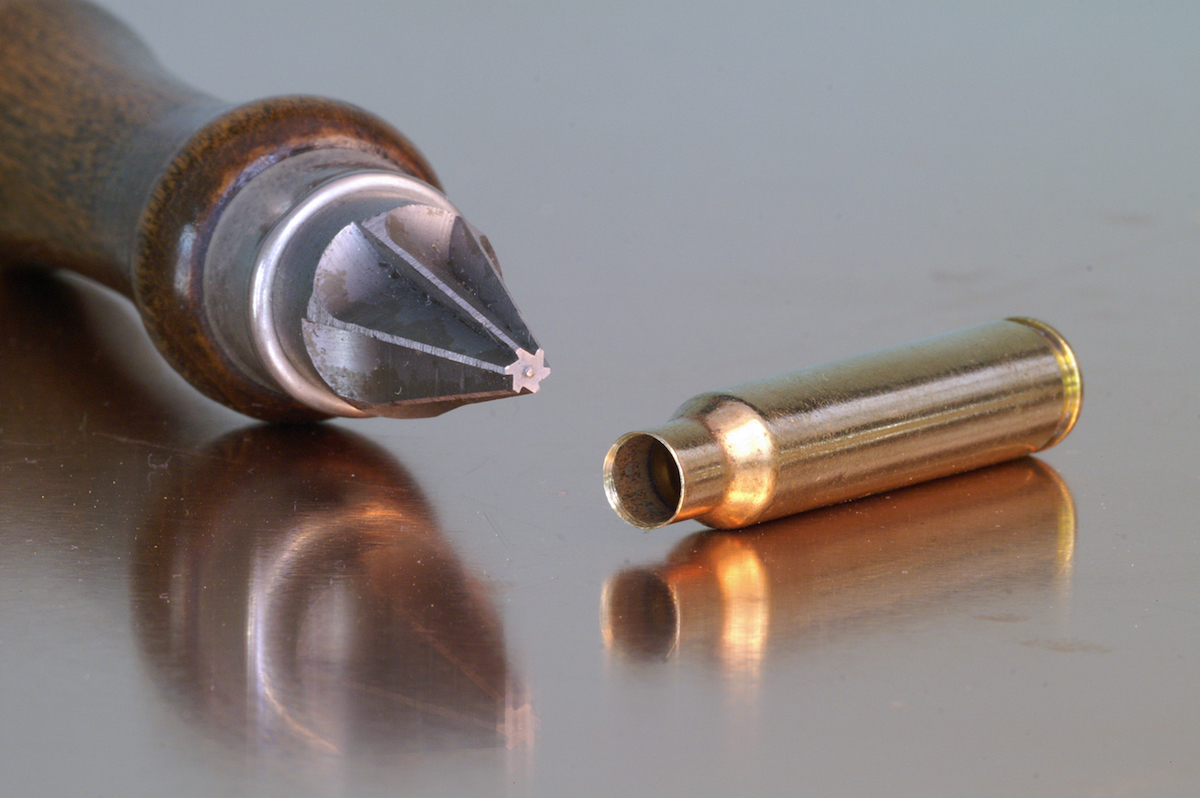
One simple thing that results in a marked decrease in jacket damage is to put a more relaxed inside chamfer on the case mouth. Switching from a 45-degree cutter to one with a 20-degree, for instance, tool angle results in a deeper, smoother chamfer. This also overall reduces entry and seating effort.
Be nice to the bullet!
4. Case Neck Attention
This is related to every other point made so far. The more consistent case neck walls are, the ultimate result is a better centered case mouth, and that results in less chance that seating the bullet is going to try to move the case neck, and also less chance there will be unequal contact as the bullet enters the case neck (less abrasion).
Better concentricity, as said, means the bullet can start straight into the neck and then all the precision alignment built into the tools gets to show its merit.
This is where brass segregation (for wall thickness consistency or runout), outside case neck turning to improve wall thickness consistency, and initial choice on the brand of brass all come in.
Much of that also comes from the choice of sizing die and how well it’s been set up, and that’s been talked on in these pages before (and will be again, no doubt).
And, making sure the case neck cylinders are all the same heights makes a difference too, because that means each bullet is encased in an equal amount of material.
Check out dies at MSSS HERE
Find a chamfer tool HERE
Learn more about custom stems HERE
The preceding is a specially-adapted excerpt from Glen’s book Top-Grade Ammo. Available HERE at Midsouth Shooters Supply. Visit ZedikerPublishing.com for more information on the book itself, and also free article downloads.