One of the world’s greatest-ever pistol shooters details the process he follows to get a 1911 on target. Pay attention! KEEP READING
SOURCE: Team Springfield, Rob Leatham
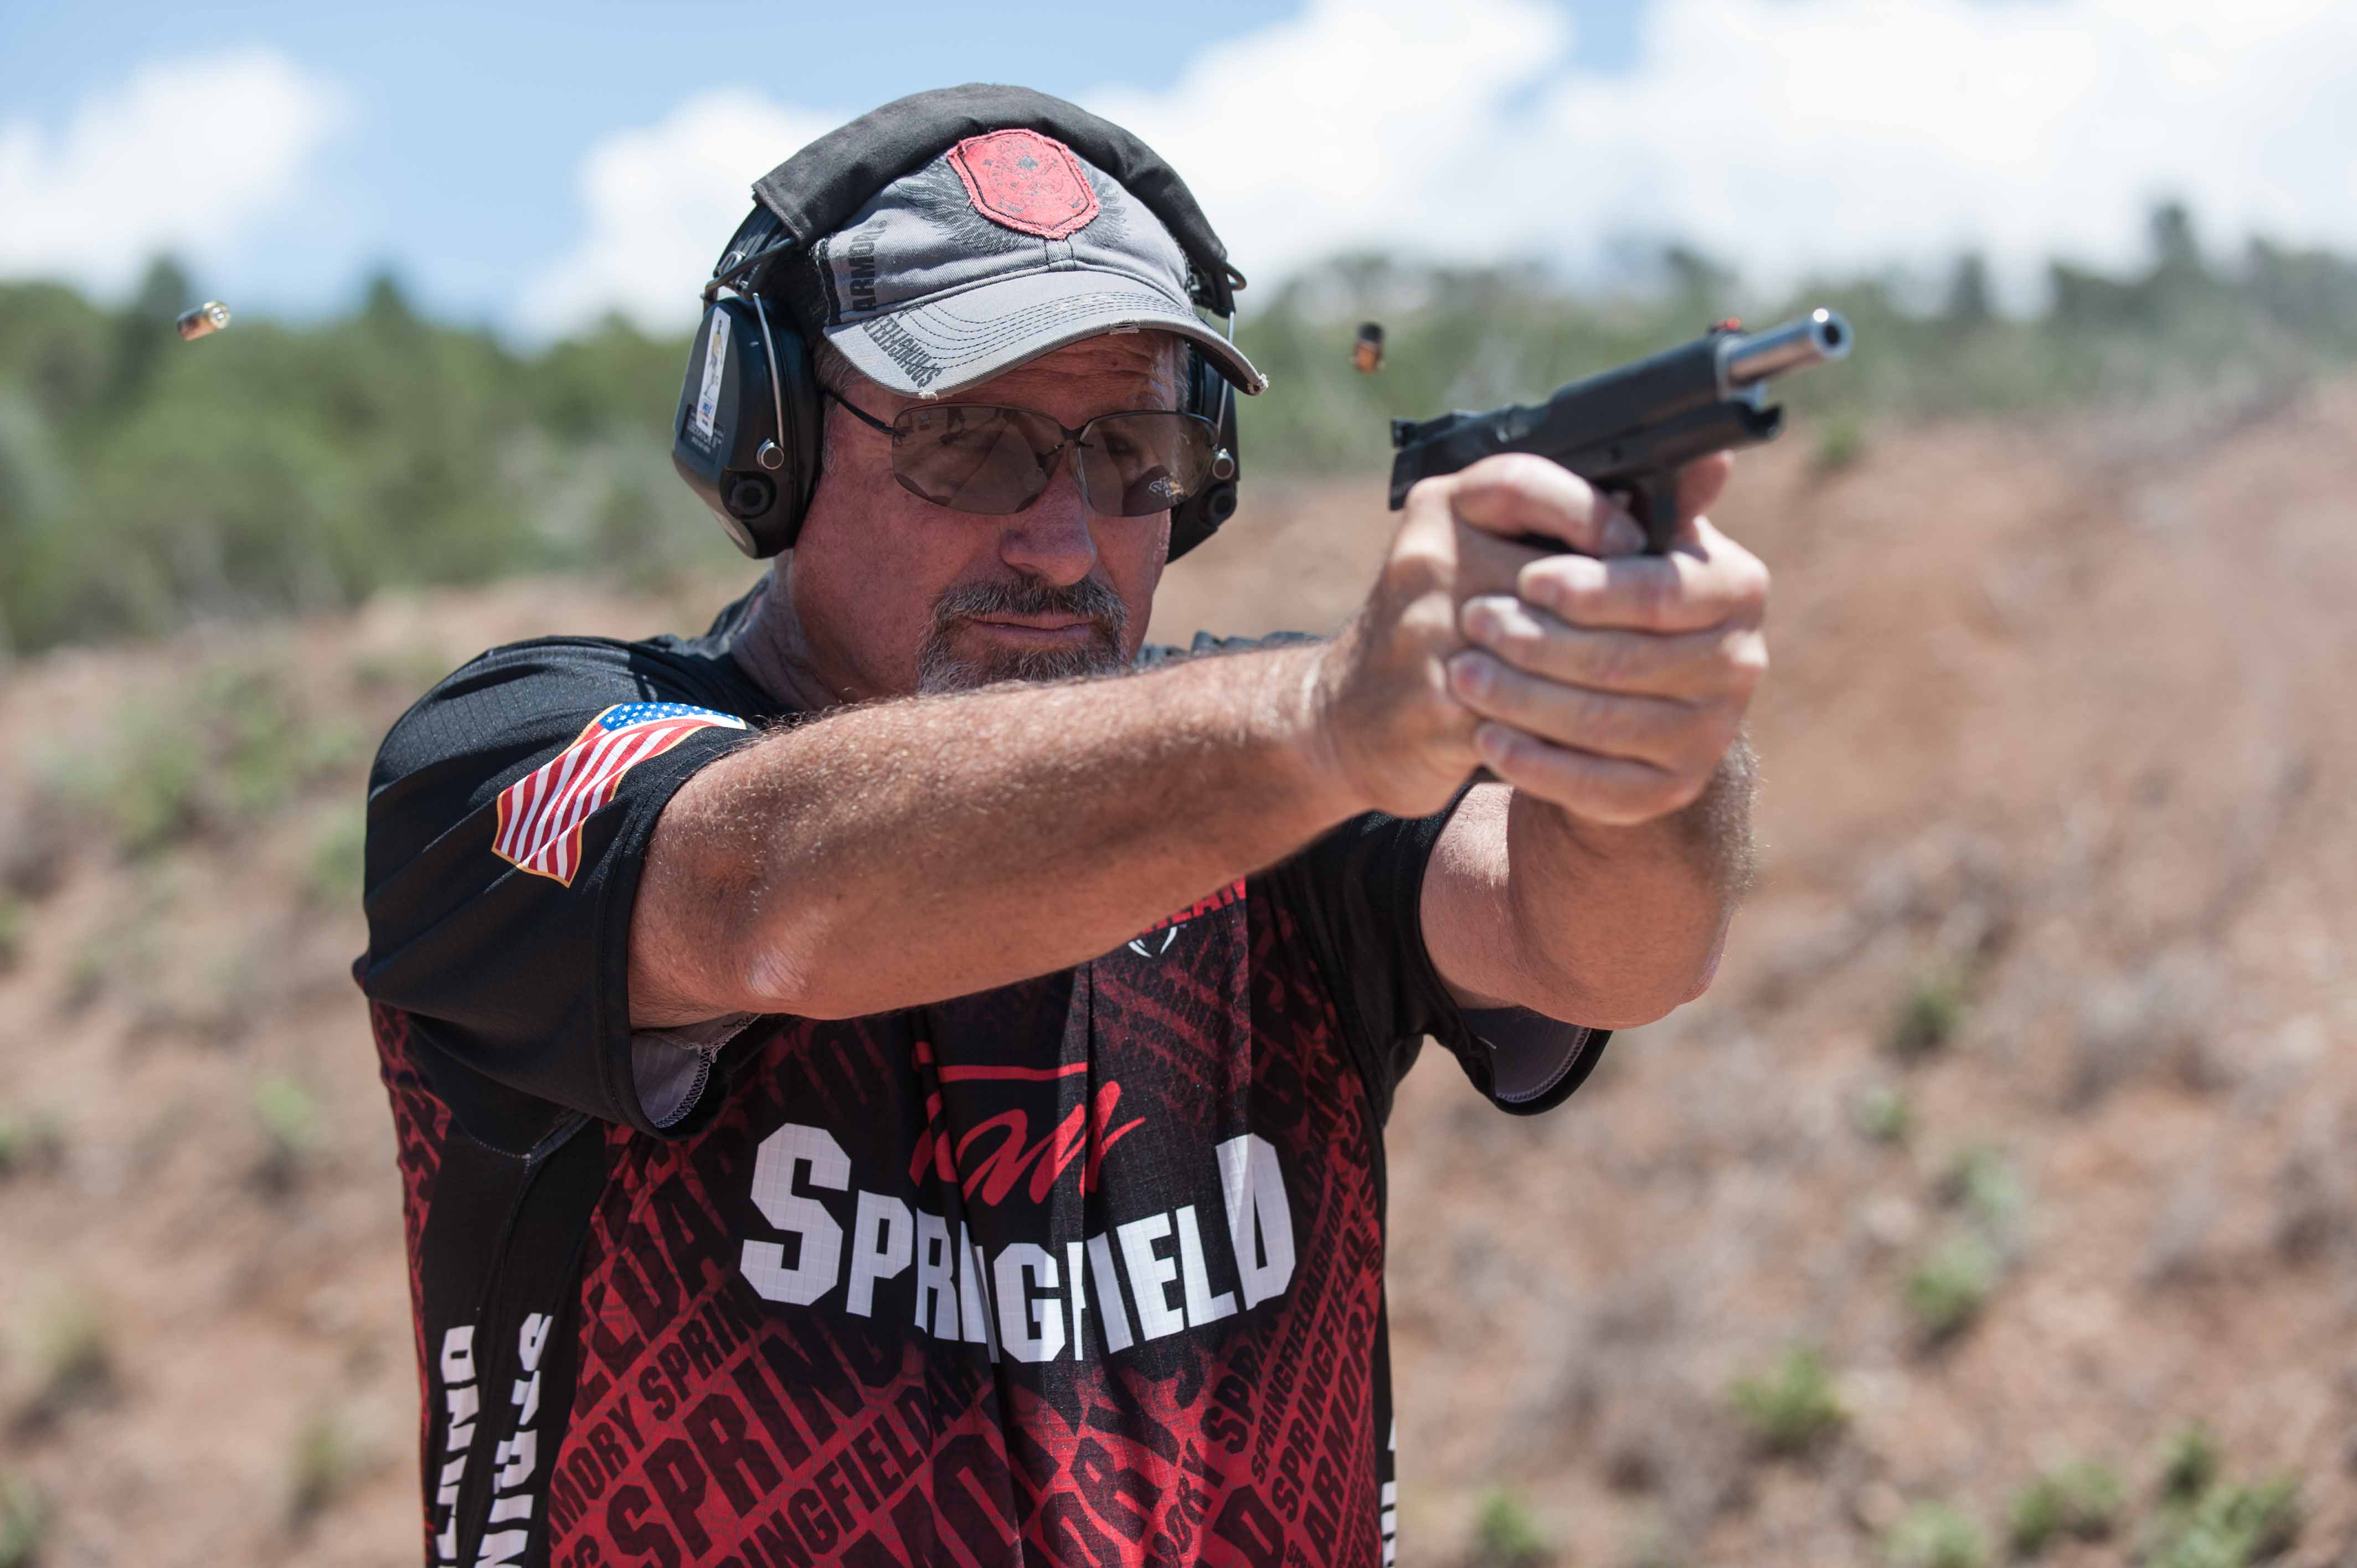
I just got my grubby little hands on a few of the new Springfield Armory® 1911 Range Officer® (RO®) Elite pistols. (Four to be exact.) And the one that grabbed my attention first was the Target Model. Probably not a big shock to those of you who know me as a competition shooter — this pistol was designed for someone just like me.
After looking it over and admiring how well put together it is, I can’t wait to see what it can do. Which means it’s time to hit the range! #LetsGoShoot
TESTING DAY
Any time I get a new gun, the first item on my to-do list is “zeroing.” Zeroing is the process where I test for point of impact on a target and, if needed, make changes to the sights to cause that position to coincide with where I actually see (or think I see) the sights on the target.
A properly zeroed pistol means there is no variation between where I aim the gun and where the bullets hit. Now, to be honest, the term “zero” means there is zero variation from sight to bullet impact. The reality, though, is there is seldom a time when I use a gun that is 100 percent “zeroed.” So for me, zeroed means “sighted in.”
Since this is kind of confusing, I’m going to document my zeroing-in process for your information and enjoyment. The RO® Elite Target is fitted with my preferred fiber-optic front sight and a fully adjustable target rear sight — a perfect setup for quick and easy zeroing.
MORE THAN MEETS THE EYES
Several factors come into play that affect zeroing a pistol:
Eyesight
Ammunition
Distance to Target
Shooter Preference and Skill
I’m pretty efficient at zeroing my guns, as I’ve been doing it for many decades. The more you do it, the better you’ll get too. Just follow these easy steps:
ZEROING PROCESS
Gun and Ammo Initial Check: I first test how well the gun shoots out of the box and which ammo is the best or most suitable. This can be done in many ways, but I usually shoot standing, slow-fire with a two-handed grip at 25 yards.
I try a variety of bullet weights, brands and loads and make my final choice of which to move forward with based on several factors, including accuracy and felt recoil.
I check to see if the grouping size is adequate for my intended need. Once I establish which load I will move forward with, I then work on point of impact (POI).
POI Versus Point-of-Aim Check: With the selected load, I use a very specific aiming point in the center of the target. A square piece of 3/4″ black tape works well, but sometimes I just use a full-size USPSA target and shoot at the “A” imprinted in the middle of the body zone or the center of the smaller “head” of the target. I shoot five-shot groups to see where the gun/ammo combination actually hits. When I establish whether it is dead on, high, low, left or right, I start making basic adjustments to the rear sight.
How precisely I zero the pistol is based on the intended use of the gun. For many applications, it is at this point “close enough” and nothing further needs to be done. My competition guns however are a different story. I want them perfect.
Windage Check: I prefer a given gun/load combo to have as little lateral variation (windage) as possible. I never want the gun to impact left or right, so if it’s off I make corrections until my hold is the variation, not the sights.
Elevation Check: As a general rule, I also do not like a gun to shoot low at the distance I am zeroing. Dead on to a little high is what I want to accomplish. Once I’ve done this, I have a basic zero. Now it gets a little more complicated.
Specific Zeros: I next determine my “practical distance and accuracy” requirements. I need a gun’s elevation to be set for a specific POI at a specific distance, based on the usage/shooting discipline.
Concealed carry guns: Dead on at 10 yards
Bullseye guns: One to two inches high at 50 yards
Bianchi pistols: Dead on at 50 yards
USPSA production & single-stack guns: One inch high at 25 yards
I shoot slow-fire groups (standing) at the required distance and make fine adjustments to both windage and elevation until I’m satisfied. Based on your skill level and ability to hold the gun stable, you may need to use a rested position. Since I notice variations in my POI between a rested and standing shooting position, I prefer to do my sighting in from the position I most likely will use, which is standing. The only time I shoot from a stabilized position (i.e., sand bags on a table, seated, etc.) is when I’m testing for accuracy, which is a completely different task.
So now that you know what I require to zero the gun, how is it that you specifically accomplish the task? Well, it’s not always a simple process, because the type of gun and kind of sights determine the difficulty of the challenge.
TYPES OF SIGHTS
A “fixed sight” gun usually allows for some windage adjustment by moving the rear sight, but elevation changes may require modification or replacement of the front or rear sight.
An “adjustable sight” gun typically has a rear sight that allows you to move the “blade” in small increments (with a small screwdriver), usually with a “click” you can hear or feel. Depending on the sight, this allows you to simply and easily make adjustments.
VARIATIONS OF SKILL
The shooter’s skill level plays a very large part in the zeroing process. You must be able to shoot well enough to determine if the gun is zeroed. If you can’t shoot a good enough group at the needed distance you may need to work on your shooting skills before you worry about adjusting the sights.
The good news is, most shooters will never see enough POI deviation at the closer distances they shoot for it to matter.
DISCIPLINE AND DISTANCE
It should be relatively simple for experienced shooters to zero their concealed carry pistols, since the guns are typically expected to be employed at very close ranges. I can’t imagine any out-of-the-box pistol deviating significantly in terms of POI from one to five yards, unless operator error interferes.
The four different XD-S® pistols I use for carry can hit a USPSA target in the center A-zone at 25 yards straight from the factory, which highly exceeds my requirement for a concealment pistol.
My IPSC Classic Division competition 1911, on the other hand, needs to be much more precise at much greater distances, as many as 60 yards. I shoot non-standard ammunition loaded to a very specific velocity to keep recoil to a minimum. I prefer a 147-grain bullet with a special powder, because I like the feel of the combination and it’s super accurate.
The Springfield factory standard ammo for 9mm is 115 grain FMJ standard velocity ball, which shoots a much different POI than my special “cheater” loads. Because of this, I almost always need to adjust the sights when I get a new gun from the shop.
I make bold adjustments at first and then fine tune it with a click here and a click there until I’m convinced that I can’t get it any better. That’s when it’s nice to have a finely tuned and easily adjustable target sight on your pistol.
CONFIDENCE AND IMPROVEMENT
Each time you get a new gun or lot/type of ammunition, be sure to follow a zeroing procedure. But do so based on your “practical distance and accuracy” requirements. I bet you will end up not only more confident in your equipment, knowing exactly where your gun impacts, but hopefully also more confident in your skill level, as you should hopefully start to become a better shot.
Find Rob on Twitter!